The next few posts will cover a major woodworking task: how to join boards together from an end-grain edge to a side-grain long edge. As you are planing and designing a project, it helps to be aware of the many available options.
To make a project, we want to engage in effective, pleasant working tasks that are functional and beautiful. So let’s go through the many types of joints.
We will start with the classic mortise and tenon. In the past, I used this in nearly every piece I made. The real beginnings were chisel-chopped mortises and hand-sawn tenons.
The joint has been around for 4000 years. Some excellent modern woodworkers use these methods regularly. I now almost never do, but let’s go through the basics of building the joint.
Here is a brief run-through of cutting the joint, mainly meant to keep it in perspective with the other types of joints to be discussed in the future posts.
Mark 90° cross lines to lay out the mortise, leaving out 1/8” – 1/4” at the bottom. It usually is helpful to extend the top of the piece an inch or so past the tenon piece to prevent impact rupture when chopping. Mark the mortise width with a double-edge gauge based on the chisel width to be used.
The tenon will not fully extend to the top of the piece. Plan a haunch at the top. For a 3” tenon, a 3/4” length for the haunch is about right. It only needs to be about 1/4” deep.
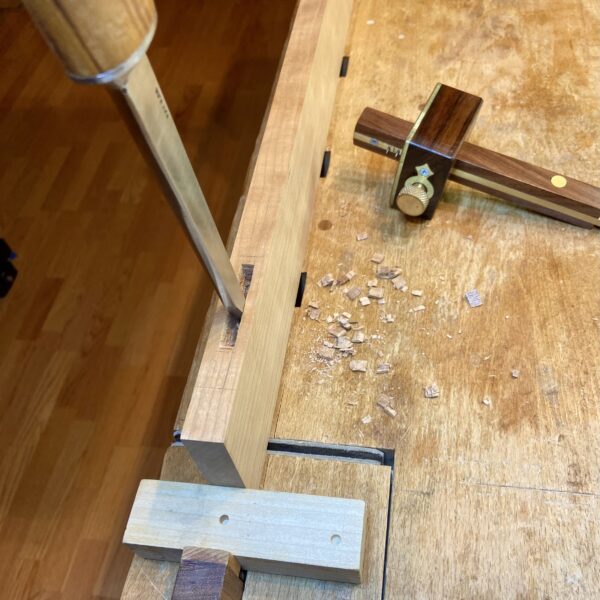
Start chopping at least 1/8” from the edge of the mortise on both ends. A true mortise chisel really pays off. It all gets more difficult as the progress goes deeper. Chisel away the ends. Saw for the haunch and chisel out the depth.
For the tenon, layout across the grain with a marking knife or fine pencil. For along the grain, layout with the double-edge marking gauge at the same set used to layout the mortise. Plan on the tenon being at least 1/16” shorter than the mortise depth.
Saw across the top of the tenon, carefully following the layout. Then go down with an angled cut on each side toward the base layout. Finish the cut straight across to the baseline.
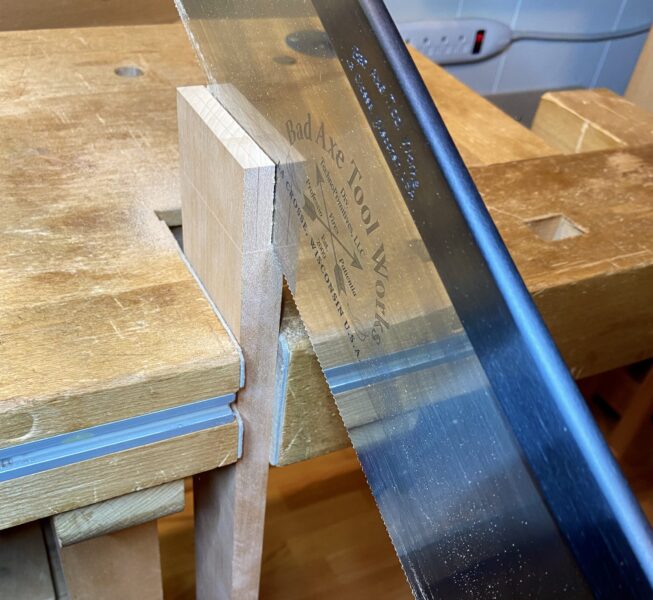
To cut the crossgrain of the tendon, you can go to the final edge with the saw. I would be less risky and saw to within a 1/64” of the knifed line. Then I would slice to the edge with a chisel.
Be generous with the tenon thickness. It is much easier to plane away a tiny bit than to saw it too narrow and have to build it back with glue-one pieces. Finally, saw away that extra horn length at the top of the mortice piece.
I know that some fine woodworkers like the hand cut mortise and tenon. Well, I did my time long ago and now would find it too much work, despite the reduced noise.
I briefly went over the hands-on method to put it in perspective with the other available methods of end to side-edge joinery.
Lots more to come in upcoming posts.