Archive for ◊ March, 2019 ◊

Author:
• Sunday, March 24th, 2019
NT Dresser

Here are a couple of handy little tools that might get overlooked. More important, they call to mind a similar shop-made necessity

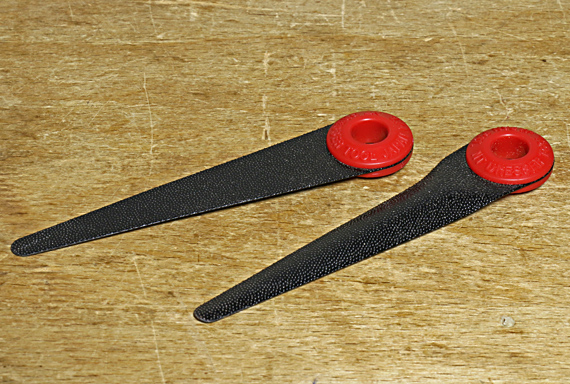
I got these NT Dresser mini rasps from Lee Valley, who call them “Japanese finger files,” as a last minute add-on to an order. No regrets though, because over the past year I have found them very helpful for finishing off details. 

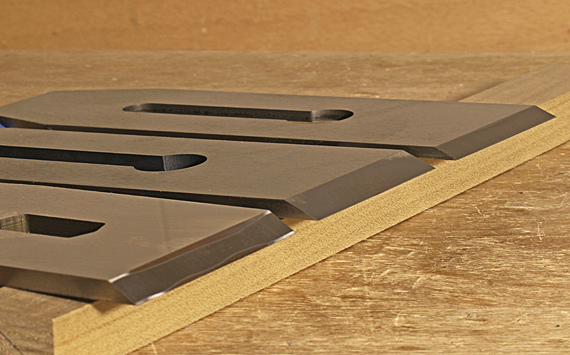
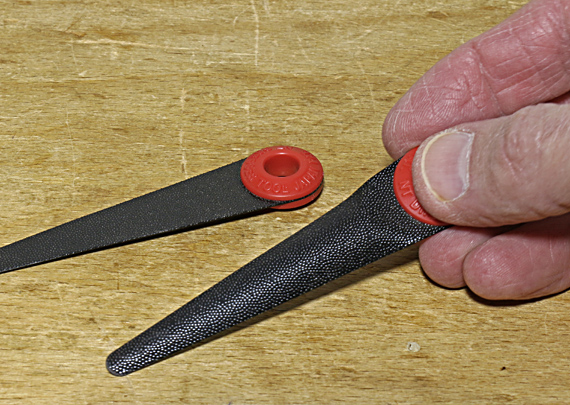
Made of stainless steel and only .023″ thick including the grit, they can get into very narrow recesses. Yet they are stiff enough, when backed up as needed with a finger, to apply adequate cutting pressure and to preserve crisp details. Below, I am holding the half-round mini rasp, which is, of course, stiffer than the flat one. 

NT Dresser mini rasps

The “grit” is composed of tiny rough, tough knobs on the steel plate. Unlike conventional detail rasps, the NT Dressers cut in any direction so they can work in some places that those other tools cannot. I easily clear them of wood dust with the same stiff hog bristle brush that I use on regular rasps.  

NT Dresser grit

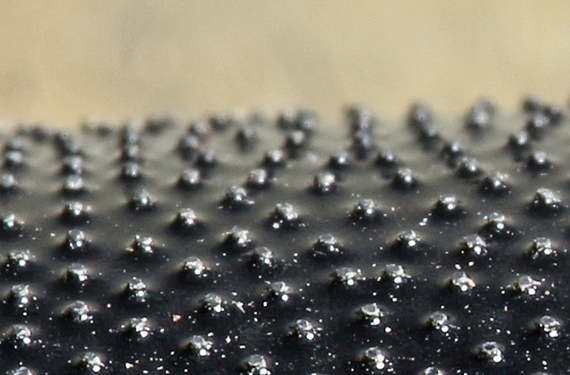
The “medium” grit sold by Lee Valley is actually quite fine. The tool feels about like 220-grit sandpaper but leaves a surface more like 320-grit sandpaper. These are not aggressive tools; they are for details. 

NT Cutter (Japan) makes these in different shapes and grits, along with a line of larger tools. 

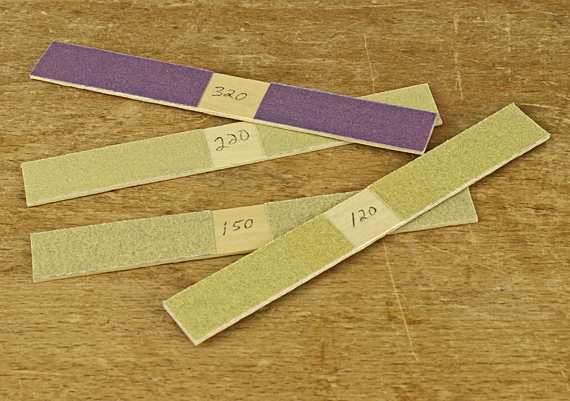
I’ve always kept a set of these little shop-made sanding sticks, pictured below, for use in countless detail and touch-up situations. They are probably not in any book’s list of important woodworking tools but I consider them shop necessities. They’re just PSA sandpaper (or glued-on regular sandpaper) on a squared-off tongue depressor or similar sliver of wood. The NT Dresser tools are more nimble though, which makes them a good complement to the old standbys.

shop-made sanding sticks

Made or bought, sometimes these humble little tools are just what you need. 

Category: Tools and Shop  | 2 Comments
Author:
• Sunday, March 17th, 2019
honeycomb lumber defect

As much as we love wood, it can hit us with some awful surprises. Honeycomb, a drying defect, is among the worst. Here I will recount my sad tale of 8/4 quartersawn white oak, hoping you will be spared the same fate. 

First, let’s briefly review a simplified version of the drying process

The outer part of the board – the shell – loses it bound water and shrinks earlier than the inner part of the board – the core. The shell is in tension because it wants to get smaller but is limited by the still moist and swollen core, which is thus in compression. If this happens too fast, surface checks may result, which later may close and go unnoticed.

The shell sets in size. Now, as the core loses its moisture, it wants to shrink but is limited by the surrounding shell. Thus, the core is now in tension and the shell in compression, a condition known as case-hardening

The kiln operator modifies the moisture content at the end of the drying process, and ideally, there would be no remaining stress. However, the irremediable state of reverse case-hardening must be avoided, so a bit of case-hardening is acceptable in the final state of most kiln-dried lumber, demonstrated by a slight inward curve of the tines of a test fork sawn from a cross-section sample of the board (below).

lumber test forks

Note that this is not a matter of a moisture gradient across the thickness of the board; it is physical stress. If you resaw lumber, you’ve certainly encountered this.

But what if the core dries too fast? Hygroscopic wood movement is a powerful force, stronger than the wood itself. Therefore, the core of the wood, desperately trying to shrink within the restricting frame of the shell, simply breaks. Honeycomb! (top photo)

Worst of all, this is not visible from anywhere on the outside of the board. The only clue you might get, which is inconsistent at best, is to note the board is oddly concave across its width on both sides. The cracks, revealed only when you crosscut the board, occur perpendicular to the annual rings in both flatsawn and quartersawn lumber.

So, what happened in this white oak board? Probably several factors conspired. 8/4 is, of course, much slower to dry than 4/4, white oak is a relatively difficult species to dry well, and quartered lumber is a bit slower to dry.  My guess is that this board was not sufficiently air dried before going to the kiln. Further, since 8/4 white oak is less common, this board was probably lumped together in the kiln with thinner lumber and/or faster drying species for which a faster kiln schedule would work. In other words, it was rushed to market. 

case-hardening test

What about using the parts of the board without honeycomb? Nope, best not. Even sections distant from the frank honeycomb were severely case hardened, as demonstrated by these test forks (above). Whether a lot or a little of the interior core was removed, the tines are bent over each other. It was amazing how forcefully they bent inward against each other before I halved their widths so they could cross over each other. Again, to be clear, there was no moisture content gradient across the thickness of the lumber.

case-hardening stress

Severe stress like this wreaks havoc in the building process. I tried to salvage the expensive board but as I would incrementally remove thickness, attempt to resaw, or shape the wood, it persistently distorted. I was constantly and futilely chasing true surfaces. Enough.  

Woodworker, beware.

Category: Wood  | 5 Comments
Author:
• Wednesday, March 06th, 2019
sharpening plane blades

Sharpening is so much at the core of hand tool woodworking, and so here are a few thoughts that build on the previous post on sharpening tests.

1. Can we close the loop and say that the proxy tests are actually validated by the tool’s performance? Based on experience, yes, regarding sharpness, edges perform as the tests predict. The tests are worthwhile.

2. Edge endurance, however, is another matter. There you are relying on the “design” of the edge and the reliability of your sharpening process. The only “test” is over time – seeing how long the edge lasts. For good results, you must match the edge geometry to the steel and the task.

For example, A-2 is a good choice of steel for a jack plane blade but if the bevel angle is too narrow, such as would be good for O-1 steel, the edge will be prone to premature chip-out. 

As another example, a plane blade with a wide bevel angle (e.g. 43°), though correctly employed in a bevel-up plane to create a high attack angle to reduce tearout, will necessarily have a shorter useful working life than narrower edges.

3. Squareness or, as appropriate, the correct skew angle, is, of course, easy to test. By the way, I find that a chisel edge that is just a bit out of square is not a big deal, as is sometimes supposed. There’s also a bit of squareness tolerance in most plane blades.

4. For many woodworkers, the most vexing matter of edge geometry is plane blade camber. For choosing, producing, and assessing camber, I invite readers to visit this series of five posts, which is about as in-depth a treatment of the subject as I think you will find anywhere. 

Stay sharp, amigos.

Category: Techniques  | 5 Comments