<?xml version="1.0" encoding="UTF-8"?><feed
	xmlns="http://www.w3.org/2005/Atom"
	xmlns:thr="http://purl.org/syndication/thread/1.0"
	xml:lang="en-US"
	>
	<title type="text">Heartwood</title>
	<subtitle type="text">inside the woodshop</subtitle>

	<updated>2026-08-19T10:07:05Z</updated>

	<link rel="alternate" type="text/html" href="https://www.rpwoodwork.com/blog" />
	<id>https://www.rpwoodwork.com/blog/feed/atom/</id>
	<link rel="self" type="application/atom+xml" href="https://www.rpwoodwork.com/blog/feed/atom/" />

	<generator uri="https://wordpress.org/" version="7.0.4">WordPress</generator>
	<entry>
		<author>
			<name>Rob</name>
					</author>

		<title type="html"><![CDATA[Priority of machines to get for woodworking (part 6)]]></title>
		<link rel="alternate" type="text/html" href="https://www.rpwoodwork.com/blog/2026/08/19/priority-of-machines-to-get-for-woodworking-part-6/" />

		<id>https://www.rpwoodwork.com/blog/?p=8880</id>
		<updated>2026-08-19T10:07:05Z</updated>
		<published>2026-08-19T10:07:05Z</published>
		<category scheme="https://www.rpwoodwork.com/blog" term="Tools and Shop" />
		<summary type="html"><![CDATA[
	<div>
	<a href="https://www.rpwoodwork.com/blog/2026/08/19/priority-of-machines-to-get-for-woodworking-part-6/"><img title="IMG_2386" src="https://www.rpwoodwork.com/blog/wp-content/uploads/2026/08/IMG_2386-300x273.jpeg" alt="Priority of machines to get for woodworking (part 6)" width="300" height="273" /></a>
	</div>
	The time for dust collection really comes when you get item #1, the thickness planer. It is difficult to run any shop without dust collection. Let’s break it down into sections.  The lighter, smaller, and mobile tool is the shop vac. This cleans up scattered wood dust and particles, including from hand woodworking. It also [&#8230;]]]></summary>

					<content type="html" xml:base="https://www.rpwoodwork.com/blog/2026/08/19/priority-of-machines-to-get-for-woodworking-part-6/"><![CDATA[
	<div>
	<a href="https://www.rpwoodwork.com/blog/2026/08/19/priority-of-machines-to-get-for-woodworking-part-6/"><img title="IMG_2386" src="https://www.rpwoodwork.com/blog/wp-content/uploads/2026/08/IMG_2386-300x273.jpeg" alt="Priority of machines to get for woodworking (part 6)" width="300" height="273" /></a>
	</div>
	<p></p>
<p>The time for <strong>dust collection</strong> really comes when you get item #1, the thickness planer. It is difficult to run any shop without dust collection. Let’s break it down into sections.<span class="Apple-converted-space"> </span></p>
<p>The lighter, smaller, and mobile tool is the <strong>shop vac</strong>. This cleans up scattered wood dust and particles, including from hand woodworking. It also attaches directly from many types of machine work such as some routing and most hand held power sanding.<span class="Apple-converted-space"> </span></p>
<p>Long ago I made do with a cheap vac from the home center &#8211; very noisy and not efficient. Much better is the <strong>Fein Turbo II</strong> (see photo) which has held up well for many years. This combines a filter and a non-woven fleece bag making it efficient and easy to empty. Less expensive options include DeWalt and Shop-Vac models. <span class="Apple-converted-space"> </span></p>
<p>I like a wireless <strong>remote control</strong> to save the hassle of reaching around when working with things like cordless sanding or Domino. (The one in the photo is a recent replacement of an older model.)<span class="Apple-converted-space"> </span></p>
<p></p>
<p>Also available are attached dust separator-collectors that collect more volume than fits in the vac itself. This seems like a good idea but it would take up <strong>too much space</strong> in my shop. <span class="Apple-converted-space"> </span></p>
<p>For the big volume wood dust and debris &#8211; the thickness planer is the best example &#8211; <strong>you need a big dust collector</strong>. Let’s go through options. <span class="Apple-converted-space"> </span></p>
<p>To save the most money, a <strong>portable dust collector</strong> is an option. It uses the usual 4” hose and takes up generally less space. I have not used one of these but at least one is said to manage a thickness planer.</p>
<p><strong>In the next lowest price range</strong> are the machines with the loose absorption bag at the top and the collection bag below, with the motor on the side. Having used one of these long ago, the drawing capacity is good but the filtering efficiency is not good.<span class="Apple-converted-space"> </span></p>
<p>Moving <strong>up in price</strong> is with a significantly <strong>better filter</strong> at the top, again with the bag below. Some look quite good.<span class="Apple-converted-space"> </span></p>
<p><strong>Going up more in price</strong>, I like the machine that I use &#8211; the Oneida. The HEPA filter really helps keep the shop clear of fine dust. Overall collection is excellent. (From their site, the Mini Gorilla that I have had for a long time has been replaced with a more convenient design.) They also have attachments to other dust collectors and shop vacs.<span class="Apple-converted-space"> </span></p>
<p></p>
<p>In this post, I am just outlining for general <strong>guidance.</strong> If you are looking to buy dust collection machine(s) to build your shop, check models online, in a store, and with friends who use them.<span class="Apple-converted-space"> </span></p>
<p><strong>To make choices for dust collection</strong> in your advancing shop, I suggest understand: 1. collection strength and volume, 2. dust exposure, 3. space, 4. convenience, 5. cost.<span class="Apple-converted-space"> </span></p>
<p><strong>Next:</strong> for the final post (#7) in this series, we’ll go through most of the rest of machinery to develop a shop.<span class="Apple-converted-space"> </span></p>]]></content>
		
					<link rel="replies" type="text/html" href="https://www.rpwoodwork.com/blog/2026/08/19/priority-of-machines-to-get-for-woodworking-part-6/#comments" thr:count="0" />
			<link rel="replies" type="application/atom+xml" href="https://www.rpwoodwork.com/blog/2026/08/19/priority-of-machines-to-get-for-woodworking-part-6/feed/atom/" thr:count="0" />
			<thr:total>0</thr:total>
			</entry>
		<entry>
		<author>
			<name>Rob</name>
					</author>

		<title type="html"><![CDATA[Priority of machines to get for woodworking (part 5)]]></title>
		<link rel="alternate" type="text/html" href="https://www.rpwoodwork.com/blog/2026/08/10/priority-of-machines-to-get-for-woodworking-part-5/" />

		<id>https://www.rpwoodwork.com/blog/?p=8866</id>
		<updated>2026-08-10T09:47:17Z</updated>
		<published>2026-08-10T09:47:17Z</published>
		<category scheme="https://www.rpwoodwork.com/blog" term="Tools and Shop" />
		<summary type="html"><![CDATA[
	<div>
	<a href="https://www.rpwoodwork.com/blog/2026/08/10/priority-of-machines-to-get-for-woodworking-part-5/"><img title="IMG_2354" src="https://www.rpwoodwork.com/blog/wp-content/uploads/2026/08/IMG_2354-scaled-e1785975937656-300x259.jpeg" alt="Priority of machines to get for woodworking (part 5)" width="300" height="259" /></a>
	</div>
	Where are we so far for the developing woodworker building the machine segment of his or her shop?  1. thickness planer with helical cutterhead 2. router with multiple functional accessories, and a router table built or bought. And throw in a hand-held power drill. 3. table saw, big or small; think safety  4. band saw; [&#8230;]]]></summary>

					<content type="html" xml:base="https://www.rpwoodwork.com/blog/2026/08/10/priority-of-machines-to-get-for-woodworking-part-5/"><![CDATA[
	<div>
	<a href="https://www.rpwoodwork.com/blog/2026/08/10/priority-of-machines-to-get-for-woodworking-part-5/"><img title="IMG_2354" src="https://www.rpwoodwork.com/blog/wp-content/uploads/2026/08/IMG_2354-scaled-e1785975937656-300x259.jpeg" alt="Priority of machines to get for woodworking (part 5)" width="300" height="259" /></a>
	</div>
	<p></p>
<p><strong>Where are we so far</strong> for the developing woodworker building the machine segment of his or her shop?<span class="Apple-converted-space"> </span></p>
<p>1. <strong>thickness planer</strong> with helical cutterhead</p>
<p>2. <strong>router</strong> with multiple functional accessories, and a <strong>router table</strong> built or bought. And throw in a hand-held power drill.</p>
<p>3. <strong>table saw</strong>, big or small; think safety<span class="Apple-converted-space"> </span></p>
<p>4.<strong> band saw</strong>; maybe even start with a jig saw or add it on</p>
<p>Now for #5: <strong>Jointer</strong>. <span class="Apple-converted-space"> </span></p>
<p>Like all the other power tools, you can do high level woodworking without it but the idea of this series is to help along most developing woodworkers with how to sensibly, efficiently, and money-wisely build the shop.</p>
<p>I see little point in going less than <strong>12”</strong> cutting width for a jointer, just as I suggested in Part 1 of this series to get a common 13” cutting width for the thickness planer. Of course, most of the time, only some, maybe little, of the 12” is used, but it is really worth it when you need it.<span class="Apple-converted-space"> </span></p>
<p>But what about a <strong>jointer-planer combo?</strong> Great &#8211; with a good helical cutterhead and the 12”. That is, if you can afford a sufficient quality and have the space.</p>
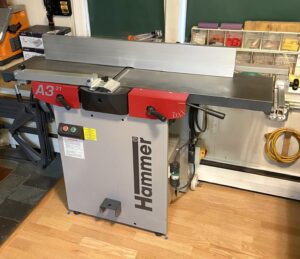
<p>I got an excellent <strong>Hammer combo</strong> (see the photos) before helical cutters became common. I hardly ever use the thickness planer segment now. I instead use the Oliver with the helical cutter (see post part 1). The “old fashion” blade cutters in the Hammer work remarkably well, though any defects from difficult grain can be fixed up with the Oliver.<span class="Apple-converted-space"> </span></p>
<p></p>
<p>For practical purposes &#8211; <strong>money/quality/space/future plans</strong> &#8211; I suggest the thickness planer (with a good helical cutter) first, <strong>then latter</strong> the jointer &#8211; also with a spiral cutterhead. Though I have not used such a jointer, I think it is not bad to save with &#8220;spiral&#8221; cutters that are HSS/tungsten-carbide/two edges, not four. (Maybe a Rikon or Cutech?) You can correct defects with the better thickness planer cutters.<span class="Apple-converted-space"> </span></p>
<p>These are relatively light, small machines that are manageable in almost any shop.<span class="Apple-converted-space"> </span></p>
<p><strong>One tip:</strong> Any new jointer should be checked (unplugged; no power on!) to make sure <i>all</i> of the cutting <em>edges</em> are in the same plane as the flat outfeed table. A trace higher is ok but edges should never be lower or variable across the width. A little imperfection on the alignment of the variable-height infeed table is probably OK. Primarily, the outfeed table governs the cut. And, of course, the fence should be flat and square set at 90°.</p>
<p>You can get each machine &#8211; thickness planer and jointer &#8211; for around a $1000, with the better quality for the thickness planer.<span class="Apple-converted-space"> </span></p>
<p style="text-align: center;">———————</p>
<p><strong>CAUTION:</strong> Electric woodworking power tools are extremely dangerous and can cause severe injury including amputation of fingers. Please do not even begin to use an electric woodworking tool without first learning safety from a highly reliable source, understanding, and using appropriate safety procedure.<span class="Apple-converted-space"> </span></p>
<p>This website is NOT the source for learning this important practice. The brief mentions on the topic are not nearly sufficient to keep you safe. <span class="Apple-converted-space">   </span></p>
<p style="text-align: center;"><b>———————</b></p>
<p>So there are my ideas so far. <strong>These posts</strong> really are more to help <strong>you</strong> come up with your own decisions as you build a shop, rather than declaring what are necessarily the “best” decisions. Like the rest of this blog, I want to <em>help</em> you see things YOUR way, not to necessarily follow me! <span class="Apple-converted-space"> </span></p>
<p><strong>Part 6 coming up.</strong></p>]]></content>
		
					<link rel="replies" type="text/html" href="https://www.rpwoodwork.com/blog/2026/08/10/priority-of-machines-to-get-for-woodworking-part-5/#comments" thr:count="2" />
			<link rel="replies" type="application/atom+xml" href="https://www.rpwoodwork.com/blog/2026/08/10/priority-of-machines-to-get-for-woodworking-part-5/feed/atom/" thr:count="2" />
			<thr:total>2</thr:total>
			</entry>
		<entry>
		<author>
			<name>Rob</name>
					</author>

		<title type="html"><![CDATA[Priority of machines to get for woodworking (part 4)]]></title>
		<link rel="alternate" type="text/html" href="https://www.rpwoodwork.com/blog/2026/08/06/priority-of-machines-to-get-for-woodworking-part-4/" />

		<id>https://www.rpwoodwork.com/blog/?p=8858</id>
		<updated>2026-08-06T04:49:06Z</updated>
		<published>2026-08-06T04:49:06Z</published>
		<category scheme="https://www.rpwoodwork.com/blog" term="Tools and Shop" />
		<summary type="html"><![CDATA[
	<div>
	<a href="https://www.rpwoodwork.com/blog/2026/08/06/priority-of-machines-to-get-for-woodworking-part-4/"><img title="IMG_2351" src="https://www.rpwoodwork.com/blog/wp-content/uploads/2026/08/IMG_2351-188x300.jpeg" alt="Priority of machines to get for woodworking (part 4)" width="188" height="300" /></a>
	</div>
	At this point in building the machine part of your shop, you would have a thickness planer, a router with key accessories, a router table built or bought, a power drill, and a table saw. What comes next is, I feel, a close call. I suggest a bandsaw. With good quality, size, and blades, it [&#8230;]]]></summary>

					<content type="html" xml:base="https://www.rpwoodwork.com/blog/2026/08/06/priority-of-machines-to-get-for-woodworking-part-4/"><![CDATA[
	<div>
	<a href="https://www.rpwoodwork.com/blog/2026/08/06/priority-of-machines-to-get-for-woodworking-part-4/"><img title="IMG_2351" src="https://www.rpwoodwork.com/blog/wp-content/uploads/2026/08/IMG_2351-188x300.jpeg" alt="Priority of machines to get for woodworking (part 4)" width="188" height="300" /></a>
	</div>
	<p></p>
<p>At this point in building the <strong>machine</strong> part of your shop, you would have a thickness planer, a router with key accessories, a router table built or bought, a power drill, and a table saw. What comes next is, I feel, a close call.</p>
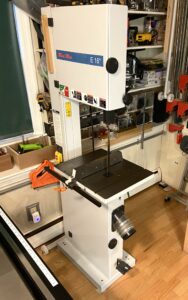
<p>I suggest a <strong>bandsaw</strong>. With good quality, size, and blades, it will always stay useful, especially as you advance in designing projects and using interesting wood. There is no good substitute for a bandsaw.<span class="Apple-converted-space"> </span></p>
<p>I suggest not doing what I did a long time ago. I bought a bandsaw with only a 6” resew capacity (maximum cutting height). After years of missing the ability to resew anything wider than 6”, I sold it for the saw with the <strong>12” capacity</strong> that I use now. The larger saw takes up virtually no addition space than the smaller saw.<span class="Apple-converted-space"> </span></p>
<p>12” is enough for me. The 2.4 <strong>HP</strong> is also good. I would not go less. A weaker 1.5 or 1.75 HP motor does not get through the cutting as easily or as accurately. The <strong>quality</strong> of the machine should be at least very good &#8211; wheel quality and alignment, table and guide accuracy, blade guidance, etc.<span class="Apple-converted-space"> </span></p>
<p>Bandsaw <strong>blades</strong> is a big topic but suffice to say here that I do everything I need with three fine quality blades.</p>
<p>With the table saw and the band saw in the sizes I prefer, <strong>220V</strong> outlets are necessary.</p>
<p>Despite all I have mentioned above, a lot of time on the band saw is done with 1” or 2” thick wood, often cutting curves and angles. With that in mind, I mention that one way of delaying buying a bandsaw is to get a <strong>cordless jig saw</strong> with a good variety of blades.</p>
<p></p>
<p>It will certainly not match a bandsaw but can still get a lot done if you do not mind making up for the reduced cut quality and accuracy.<span class="Apple-converted-space">   </span></p>
<p>So now as your shop is continuing to grow in power machinery, let’s see <strong>what could be next</strong>. This is coming up in the next post!</p>
<p style="text-align: center;">———————</p>
<p><strong>CAUTION:</strong> Electric woodworking power tools are extremely dangerous and can cause severe injury including amputation of fingers. Please do not even begin to use an electric woodworking tool without first learning safety from a highly reliable source, understanding, and using appropriate safety procedure.<span class="Apple-converted-space"> </span></p>
<p>This website is NOT the source for learning this important practice. The brief mentions on the topic are not nearly sufficient to keep you safe. <span class="Apple-converted-space">   </span></p>
<p style="text-align: center;"><b>———————</b></p>]]></content>
		
					<link rel="replies" type="text/html" href="https://www.rpwoodwork.com/blog/2026/08/06/priority-of-machines-to-get-for-woodworking-part-4/#comments" thr:count="2" />
			<link rel="replies" type="application/atom+xml" href="https://www.rpwoodwork.com/blog/2026/08/06/priority-of-machines-to-get-for-woodworking-part-4/feed/atom/" thr:count="2" />
			<thr:total>2</thr:total>
			</entry>
		<entry>
		<author>
			<name>Rob</name>
					</author>

		<title type="html"><![CDATA[Priority of machines to get for woodworking (part 3)]]></title>
		<link rel="alternate" type="text/html" href="https://www.rpwoodwork.com/blog/2026/07/31/priority-of-machines-to-get-for-woodworking-part-3/" />

		<id>https://www.rpwoodwork.com/blog/?p=8844</id>
		<updated>2026-08-01T04:04:30Z</updated>
		<published>2026-08-01T03:58:30Z</published>
		<category scheme="https://www.rpwoodwork.com/blog" term="Tools and Shop" />
		<summary type="html"><![CDATA[
	<div>
	<a href="https://www.rpwoodwork.com/blog/2026/07/31/priority-of-machines-to-get-for-woodworking-part-3/"><img title="IMG_2350" src="https://www.rpwoodwork.com/blog/wp-content/uploads/2026/07/IMG_2350-scaled-e1785552622321-300x279.jpeg" alt="Priority of machines to get for woodworking (part 3)" width="300" height="279" /></a>
	</div>
	The third machine to buy as you are getting into woodworking and making a shop: the table saw. Clean, accurate, straight cuts along the length of grain, as well as dead-on cross cuts are required for most projects. Angled cuts at 45°, or any angle, are common.  Hand cutting cannot match the speed and accuracy [&#8230;]]]></summary>

					<content type="html" xml:base="https://www.rpwoodwork.com/blog/2026/07/31/priority-of-machines-to-get-for-woodworking-part-3/"><![CDATA[
	<div>
	<a href="https://www.rpwoodwork.com/blog/2026/07/31/priority-of-machines-to-get-for-woodworking-part-3/"><img title="IMG_2350" src="https://www.rpwoodwork.com/blog/wp-content/uploads/2026/07/IMG_2350-scaled-e1785552622321-300x279.jpeg" alt="Priority of machines to get for woodworking (part 3)" width="300" height="279" /></a>
	</div>
	<p></p>
<p><strong>The third machine</strong> to buy as you are getting into woodworking and making a shop: the table saw.</p>
<p>Clean, accurate, straight cuts along the length of grain, as well as dead-on cross cuts are required for most projects. Angled cuts at 45°, or any angle, are common.<span class="Apple-converted-space"> </span></p>
<p>Hand cutting cannot match the speed and accuracy of the <strong>table saw</strong>. The band saw, miter saw, scroll saw, jig saw, track saw, and circular saw, even with all if their jigs and accessories cannot match the efficiency and convenience of the table saw.</p>
<p>There are, however, <strong>three big problems</strong> with table saws:<span class="Apple-converted-space"> </span></p>
<p>1. statistically, the most <strong>dangerous</strong> tool in the shop<span class="Apple-converted-space"> </span></p>
<p>2. <strong>expense<span class="Apple-converted-space"> </span></strong></p>
<p>3. they generally take a lot of <strong>space</strong> for the machine and the work itself</p>
<p><strong>Starting with the first issue,</strong> I want you to realize that it really is <strong>critical!</strong> This website is not the place to learn safety. Please learn from the excellent sources available in books and magazines, some classes, and some of the online videos.<span class="Apple-converted-space"> </span></p>
<p>An example is in Fine Woodworking #315, Jan/Feb 2025, page 32 &#8211; 37, by Roland Johnson, regarding kickbacks and more. I like some of Stumpy Nubs videos on YouTube. Search on your own for more.<span class="Apple-converted-space"> </span></p>
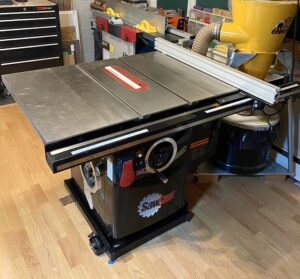
<p>As you can see from the photo, I have a SawStop. This can detect blade-to-skin contact, and then stop and drop the blade extremely quickly. I have never touched a running blade in the 21 years that I have owned it but I am glad the precaution is there. You can <strong>consider SawStop</strong> despite the extra price. Machine production, marketing, and legal restrictions may change, so keep track of the available options in SawStop and other brands.<span class="Apple-converted-space"> </span></p>
<p>In the photo here, I have intentionally left out the splitter, crosscut gauge, blade guard, kickback risk controls, and other safety devises and issues. That is your job to study.<span class="Apple-converted-space"> </span></p>
<p style="text-align: center;">———————</p>
<p><strong>CAUTION:</strong> Electric woodworking power tools are extremely dangerous and can cause severe injury including amputation of fingers. Please do not even begin to use an electric woodworking tool without first learning safety from a highly reliable source, understanding, and using appropriate safety procedure.<span class="Apple-converted-space"> </span></p>
<p>This website is NOT the source for learning this important practice. The brief mentions on the topic are not nearly sufficient to keep you safe. <span class="Apple-converted-space">   </span></p>
<p style="text-align: center;"><b>———————</b></p>
<p><strong>Expense and space</strong> in the shop are issues for almost all of us.<span class="Apple-converted-space"> </span></p>
<p>The photo shows the table saw in its mode (unplugged, with the blade fully lowered) as a secondary “bench top” which I need for some veneer work and assembly work. So you can work around the size of the table saw by converting a good, strong, accurate top it in this way.<span class="Apple-converted-space"> </span></p>
<p>Perhaps you want to start off with a much <strong>less expensive</strong> compact saw (SawStop is an option). Consider that projects you want to do and the sizes and space of the boards involved.<span class="Apple-converted-space"> </span></p>
<p>By the way, I do not own or want a table saw dado blade.</p>
<p>So, a <strong>table saw gets spot #3</strong> for the developing woodworker, in my opinion.</p>
<p><strong>Number 4 coming up.</strong><span class="Apple-converted-space"> </span></p>]]></content>
		
					<link rel="replies" type="text/html" href="https://www.rpwoodwork.com/blog/2026/07/31/priority-of-machines-to-get-for-woodworking-part-3/#comments" thr:count="4" />
			<link rel="replies" type="application/atom+xml" href="https://www.rpwoodwork.com/blog/2026/07/31/priority-of-machines-to-get-for-woodworking-part-3/feed/atom/" thr:count="4" />
			<thr:total>4</thr:total>
			</entry>
		<entry>
		<author>
			<name>Rob</name>
					</author>

		<title type="html"><![CDATA[Priority of machines to get for woodworking (part 2)]]></title>
		<link rel="alternate" type="text/html" href="https://www.rpwoodwork.com/blog/2026/07/24/priority-of-machines-to-get-for-woodworking-part-2/" />

		<id>https://www.rpwoodwork.com/blog/?p=8821</id>
		<updated>2026-07-31T03:33:00Z</updated>
		<published>2026-07-25T02:40:03Z</published>
		<category scheme="https://www.rpwoodwork.com/blog" term="Tools and Shop" />
		<summary type="html"><![CDATA[
	<div>
	<a href="https://www.rpwoodwork.com/blog/2026/07/24/priority-of-machines-to-get-for-woodworking-part-2/"><img title="IMG_2331" src="https://www.rpwoodwork.com/blog/wp-content/uploads/2026/07/IMG_2331-scaled-e1784835010674-294x300.jpeg" alt="Priority of machines to get for woodworking (part 2)" width="294" height="300" /></a>
	</div>
	Machine tool number two that I suggest to bring on as you get into woodworking: the router.  To repeat: yes, of course, high quality woodworking can be done without any machine at all, as it has been for hundreds of years. Yet machines do add many advantages of labor, time, fast accuracy, and production.  Routers [&#8230;]]]></summary>

					<content type="html" xml:base="https://www.rpwoodwork.com/blog/2026/07/24/priority-of-machines-to-get-for-woodworking-part-2/"><![CDATA[
	<div>
	<a href="https://www.rpwoodwork.com/blog/2026/07/24/priority-of-machines-to-get-for-woodworking-part-2/"><img title="IMG_2331" src="https://www.rpwoodwork.com/blog/wp-content/uploads/2026/07/IMG_2331-scaled-e1784835010674-294x300.jpeg" alt="Priority of machines to get for woodworking (part 2)" width="294" height="300" /></a>
	</div>
	<p></p>
<p><strong>Machine tool number two</strong> that I suggest to bring on as you get into woodworking: <strong>the router</strong>.<span class="Apple-converted-space"> </span></p>
<p>To repeat: yes, of course, high quality woodworking can be done without any machine at all, as it has been for hundreds of years. Yet machines do add many advantages of labor, time, fast accuracy, and production.<span class="Apple-converted-space"> </span></p>
<p><strong>Routers</strong> do so many things: joinery, grooves, curved edges, patterns, and more. I use routing in nearly every project.<span class="Apple-converted-space"> </span></p>
<p><strong>The Bosch 1617EVS</strong> 2.25 HP (photo above) is an excellent router for overall use. There certainly are other good choices of this type but the Bosch is one I can recommend based on using it for many years in countless projects. It can run 1/4” and 1/2” shank bits with plenty of power at 12 amps. <span class="Apple-converted-space"> </span></p>
<p>This gets most of its use in my router table. Cutting hight is easily adjustable to .004”, though you can easily go to .002” increments. It also can be used upright with hand pushing guided by various types of edge or circle guides (one is in the photo above) and fences.<span class="Apple-converted-space"> </span></p>
<p>Also get a <strong>plunge base</strong> for the Bosch and use it for mortising with a good jig setup. This topic is discussed in a series of 10 posts “End to side-edge joinery” 12/31/25 through 3/12/26, particularly <strong>the 1/9/26 post</strong>. In summary, the plunge base and jig setup are certainly worth having.</p>
<p style="text-align: center;">———————</p>
<p><strong>CAUTION:</strong> Electric woodworking power tools are extremely dangerous and can cause severe injury including amputation of fingers. Please do not even begin to use an electric woodworking tool without first learning safety from a highly reliable source, understanding, and using appropriate safety procedure.<span class="Apple-converted-space"> </span></p>
<p>This website is <strong>NOT</strong> the source for learning this important practice. The brief mentions on the topic are not nearly sufficient to keep you safe. <span class="Apple-converted-space">   </span></p>
<p style="text-align: center;">———————</p>
<p></p>
<p>I have long had a heavy <strong>Elu 3338</strong> plunge router and use that for mortising. It can easily cut large, wide, and deep mortises. It has long been out of production but mine still runs well. Others are available. <span class="Apple-converted-space"> </span></p>
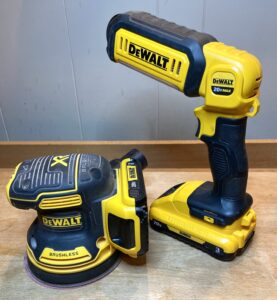
<p>I also have a handy compact router, the <strong>DeWalt DWP611</strong> (see the group photo). This is useful with various setups for figured edging, special joinery, etc. Transferred to its plunge base, it can be used in jigs for mortise and tenon. The 7 amp power is not a good choice for all but narrow, very short mortises.</p>
<p>Having the one router like the Bosch 1617 and accessories, buy or build a <strong>router table</strong>. I long ago made one that still works very well. I suggest to a new woodworker to spend the money, save the effort, and get one of the many well-made tables now available.<span class="Apple-converted-space">   </span></p>
<p></p>
<p>You can get a JessEm or a Woodpeckers table for several hundred dollars to over $2000. I can only imagine they are excellent but having successfully used my self-made version for a long time, I know you can spend a fraction of that and work very well. For example, the Bosch RA1171 router table plus the 1617 router including the plunge base is now about $500.<span class="Apple-converted-space"> </span></p>
<p>Remember, I do not sell here, or take any payments or kickbacks, etc. Shop around, read honest reviews, ask your friends.<span class="Apple-converted-space"> </span></p>
<p>One more addition to the “part 2”: a <strong>power drill</strong>. Just a simple, good, cordless drill such as the DeWalt shown here. Screws, dowel joinery, and countless other holes are needed in every shop, as well as around the home.</p>
<p></p>
<p>That is what I suggest for a new woodworker’s second electric machines that follow the <strong>thickness planer</strong>.</p>
<p><strong>In the next post, we’ll go to #3.</strong></p>]]></content>
		
					<link rel="replies" type="text/html" href="https://www.rpwoodwork.com/blog/2026/07/24/priority-of-machines-to-get-for-woodworking-part-2/#comments" thr:count="1" />
			<link rel="replies" type="application/atom+xml" href="https://www.rpwoodwork.com/blog/2026/07/24/priority-of-machines-to-get-for-woodworking-part-2/feed/atom/" thr:count="1" />
			<thr:total>1</thr:total>
			</entry>
		<entry>
		<author>
			<name>Rob</name>
					</author>

		<title type="html"><![CDATA[Priority of machines to get for woodworking (part 1)]]></title>
		<link rel="alternate" type="text/html" href="https://www.rpwoodwork.com/blog/2026/07/17/priority-of-machines-to-get-for-woodworking-part-1/" />

		<id>https://www.rpwoodwork.com/blog/?p=8804</id>
		<updated>2026-07-31T03:23:53Z</updated>
		<published>2026-07-17T22:44:53Z</published>
		<category scheme="https://www.rpwoodwork.com/blog" term="Tools and Shop" />
		<summary type="html"><![CDATA[
	<div>
	<a href="https://www.rpwoodwork.com/blog/2026/07/17/priority-of-machines-to-get-for-woodworking-part-1/"><img title="IMG_2329" src="https://www.rpwoodwork.com/blog/wp-content/uploads/2026/07/IMG_2329-scaled-e1784323276878-300x203.jpeg" alt="Priority of machines to get for woodworking (part 1)" width="300" height="203" /></a>
	</div>
	Having recently been visited by a starting woodworker for some discussion and tips, this topic quickly rose. This moved me to write, so here we go.  You do not absolutely need any machines/power tools. Look in a museum, online, or in a book at some 300 year-old amazing furniture. No electric machines. Though surely one [&#8230;]]]></summary>

					<content type="html" xml:base="https://www.rpwoodwork.com/blog/2026/07/17/priority-of-machines-to-get-for-woodworking-part-1/"><![CDATA[
	<div>
	<a href="https://www.rpwoodwork.com/blog/2026/07/17/priority-of-machines-to-get-for-woodworking-part-1/"><img title="IMG_2329" src="https://www.rpwoodwork.com/blog/wp-content/uploads/2026/07/IMG_2329-scaled-e1784323276878-300x203.jpeg" alt="Priority of machines to get for woodworking (part 1)" width="300" height="203" /></a>
	</div>
	<p></p>
<p>Having recently been visited by a starting woodworker for some discussion and tips, this topic quickly rose. This moved me to write, so here we go.<span class="Apple-converted-space"> </span></p>
<p>You do not <strong>absolutely need</strong> any machines/power tools. Look in a museum, online, or in a book at some 300 year-old amazing furniture. No electric machines. Though surely one person did not make an entire piece.</p>
<p>Before about 55 years ago, I also had no power tools. Though I made lower quality things, a few are still used. Later, I bought an electric jigsaw and borrowed a power drill.<span class="Apple-converted-space"> </span></p>
<p>So, if you want the quiet, prefer the effort, like the feel, and maybe want to save <strong>money</strong>, enjoy non-electric woodworking! You can still make excellent things!</p>
<p>The first power tool I recommend is a <strong>thickness planer</strong> with a <strong>helical cutterhead</strong> and 13” cutting width. Most have a 6” cutting depth capacity, more than you are ever likely to need in usual use.<span class="Apple-converted-space"> </span></p>
<p>You can get one for well under $1000. A 15” model, though a stronger cutter with larger infeed and outfield planks, is much more expensive, much heavier to move, and you only gain 2” of cutting width.</p>
<p>I now use an <strong>Oliver</strong> (a little more expensive than some). It works very well for accurate flat thickness. It cuts an excellent surface finish with virtually no tear out, even in difficult wood. My old DeWalt, to which I built in a helical cutterhead, inexplicably bit the dust last year.<span class="Apple-converted-space"> </span></p>
<p></p>
<p>The thickness planer does more work, faster and easier, than any other power tool in my shop. <span class="Apple-converted-space"> </span></p>
<p>This is a fairly heavy machine to move, so I keep it removably screwed on a wood framed platform with at least 4 1/2 feet access on both in-feed and out-feed to allow the vast majority of my work. I use dust collection but that is getting ahead of the overall subject.</p>
<p>Of course, this machine only makes the side being cut come out<strong> flat</strong> if the bottom side of the board is already flat. Otherwise, the machine bends the board and transfers much of the error at the bottom to the cut surface at the top.</p>
<p><strong>If this is your only machine</strong>, what can you do? The most traditional answer is to hand plane the foundation side to be flat. Keep in mind that hand planing has much of the same bending effect as the thickness machine.</p>
<p>You can tape a few slivers of wood/veneer/playing cards at the bottom, using a truly <strong>flat</strong> workbench for reference to make it not wobble. Once the top surface is planed flat, flip it over, remove the slivers, and machine it. Alternatively, you can bypass hand planing by securely taping the slivers and then directly feeding it into the machine. Make the top flat, then flip it over to do the other side after removing the slivers.</p>
<p>Thickness planers at this level tend to slightly over cut the first 2 to 3 inches of the board <strong>going in and coming out</strong>. The simplest trick to avoid this is to send in a foot-long piece first, touch the tail end with just the workpiece going in, grab the foot-long by its leading end on the way out, and pass it or another piece in again at the tail of the workpiece. This works. <strong>Safety is your responsibility</strong> but please keep your hands well away from the opening of the cutting zone!</p>
<p style="text-align: center;">———————</p>
<p><strong>CAUTION:</strong> Electric woodworking power tools are extremely dangerous and can cause severe injury including amputation of fingers. Please do not even begin to use an electric woodworking tool without first learning safety from a highly reliable source, understanding, and using appropriate safety procedure.<span class="Apple-converted-space"> </span></p>
<p>This website is <strong>NOT</strong> the source for learning this important practice. The brief mentions on the topic are not nearly sufficient to keep you safe. <span class="Apple-converted-space">   </span></p>
<p style="text-align: center;">———————</p>
<p>Having no other machine, you can still size, straighten, and square the edges and ends of the workpieces to perfection with a <strong>hand saw and hand plane</strong>. Sure, I do most by machinery, but if you are starting out and/or lack space or money, this is very doable work without plugging in.<span class="Apple-converted-space"> </span></p>
<p><strong>Next</strong>, my suggestion for the next machine to buy early on.<span class="Apple-converted-space"> </span></p>]]></content>
		
					<link rel="replies" type="text/html" href="https://www.rpwoodwork.com/blog/2026/07/17/priority-of-machines-to-get-for-woodworking-part-1/#comments" thr:count="3" />
			<link rel="replies" type="application/atom+xml" href="https://www.rpwoodwork.com/blog/2026/07/17/priority-of-machines-to-get-for-woodworking-part-1/feed/atom/" thr:count="3" />
			<thr:total>3</thr:total>
			</entry>
		<entry>
		<author>
			<name>Rob</name>
					</author>

		<title type="html"><![CDATA[The wood monitor]]></title>
		<link rel="alternate" type="text/html" href="https://www.rpwoodwork.com/blog/2026/07/03/the-wood-monitor/" />

		<id>https://www.rpwoodwork.com/blog/?p=8787</id>
		<updated>2026-07-03T10:31:31Z</updated>
		<published>2026-07-03T10:25:17Z</published>
		<category scheme="https://www.rpwoodwork.com/blog" term="Jigs and Fixtures" /><category scheme="https://www.rpwoodwork.com/blog" term="Tools and Shop" />
		<summary type="html"><![CDATA[
	<div>
	<a href="https://www.rpwoodwork.com/blog/2026/07/03/the-wood-monitor/"><img title="IMG_2300" src="https://www.rpwoodwork.com/blog/wp-content/uploads/2026/07/IMG_2300-300x141.jpeg" alt="The wood monitor" width="300" height="141" /></a>
	</div>
	I think it would be good to review and make sense of this handy device that was pictured and cited in the previous post. As you can see from the photo above, this is simply a glue-up of three pieces of flat sawn red oak on a base of plywood. It is 11/16” thick, and [&#8230;]]]></summary>

					<content type="html" xml:base="https://www.rpwoodwork.com/blog/2026/07/03/the-wood-monitor/"><![CDATA[
	<div>
	<a href="https://www.rpwoodwork.com/blog/2026/07/03/the-wood-monitor/"><img title="IMG_2300" src="https://www.rpwoodwork.com/blog/wp-content/uploads/2026/07/IMG_2300-300x141.jpeg" alt="The wood monitor" width="300" height="141" /></a>
	</div>
	<p></p>
<p>I think it would be good to review and make sense of this handy device that was pictured and cited in the previous post.</p>
<p>As you can see from the photo above, this is simply a glue-up of three pieces of flat sawn <strong>red oak </strong>on a base of plywood. It is 11/16” thick, and <i>about</i> 15” from the screwed-down end point on the left to the opposite end where it is measured. I cross sawed it from a much larger piece. The “long” grain (which is essentially stable) is just 1 1/2”. <span class="Apple-converted-space">   </span></p>
<p>Observe that the glue up is done with pieces in <strong>alternating grain orientation</strong> to avoid a large curl-shaped change with moisture change. The large amount of exposed end grain allows moisture content and resultant wood movement to change rather quickly with humidity change. Changes of temperature have no significant effect on the wood length.<span class="Apple-converted-space"> </span></p>
<p>Note also that this wood has <strong>not been finished</strong>. Therefore, reduction in expansion and contraction, depending on the type of finish used in a project, does not affect this device.<span class="Apple-converted-space"> </span></p>
<p>There is a <strong>grid</strong> of 1/16” gradation on the plywood base at the right end of the red oak. (The grid is actually wider than needed.) A brad in only the plywood meets the bottom side of the oak to prevent it from rolling from the screw hold and dropping down when you pick up the device to look closer. It is stored vertically on the wall using the hole just above screwed end.<span class="Apple-converted-space">   </span></p>
<p>left side:</p>
<p></p>
<p>right side:</p>
<p></p>
<p>The full range of <strong>movement</strong>, going from the initial full ~30% water content of wood to fully dried in an oven to 0% content, for red oak, is 4.0% radially and 8.6% tangentially. The approximately “flatsawn” wood in this piece would move somewhere between those two numbers, closer to the 8.6%. Let’s say about 7%.</p>
<p>So, if this piece of red oak went from the ~30% wet to oven dry, it would loose about 7% of its length. 15” would become about 14”. Of course, this never happens in the shop.</p>
<p><strong>What if it really went</strong> from a humid shop holding it with 13% moisture content to the shop being drier and holding it with 7% moisture content? The 15” board would shrink to about 14 3/4”. You would see that on the gradation at the right end of the gauge.</p>
<p>Does this really happen? Yes, or at least somewhat that. Also, note that wood shrinkage and expansion actually decreases in range over the years. So, you may observe less than you calculate. However, the expansion-contraction <strong>issue is real</strong> and must be considered in your construction design.</p>
<p>This simple monitor helps keep you aware of this in a rather large but simple example. <strong>I highly recommend it for your shop.</strong> It is very easy to make!</p>]]></content>
		
					<link rel="replies" type="text/html" href="https://www.rpwoodwork.com/blog/2026/07/03/the-wood-monitor/#comments" thr:count="0" />
			<link rel="replies" type="application/atom+xml" href="https://www.rpwoodwork.com/blog/2026/07/03/the-wood-monitor/feed/atom/" thr:count="0" />
			<thr:total>0</thr:total>
			</entry>
		<entry>
		<author>
			<name>Rob</name>
					</author>

		<title type="html"><![CDATA[In close reach]]></title>
		<link rel="alternate" type="text/html" href="https://www.rpwoodwork.com/blog/2026/07/01/in-close-reach/" />

		<id>https://www.rpwoodwork.com/blog/?p=8778</id>
		<updated>2026-07-01T08:35:48Z</updated>
		<published>2026-07-01T08:35:48Z</published>
		<category scheme="https://www.rpwoodwork.com/blog" term="Tools and Shop" />
		<summary type="html"><![CDATA[
	<div>
	<a href="https://www.rpwoodwork.com/blog/2026/07/01/in-close-reach/"><img title="IMG_2299" src="https://www.rpwoodwork.com/blog/wp-content/uploads/2026/07/IMG_2299-scaled-e1782889186671-259x300.jpeg" alt="In close reach" width="259" height="300" /></a>
	</div>
	I have accumulated attachments for several handy items on the wall just behind the right side of my workbench. This allows for quick grabs and returns of very frequently used helpers. Here they are, left to right, top to bottom: 1. The shop-made tool oiler. I wrote about making this in a 3/29/2009 post: https://www.rpwoodwork.com/blog/2009/03/09/shopmade-tool-oiler/ [&#8230;]]]></summary>

					<content type="html" xml:base="https://www.rpwoodwork.com/blog/2026/07/01/in-close-reach/"><![CDATA[
	<div>
	<a href="https://www.rpwoodwork.com/blog/2026/07/01/in-close-reach/"><img title="IMG_2299" src="https://www.rpwoodwork.com/blog/wp-content/uploads/2026/07/IMG_2299-scaled-e1782889186671-259x300.jpeg" alt="In close reach" width="259" height="300" /></a>
	</div>
	<p></p>
<p>I have accumulated attachments for several handy <strong>items on the wall</strong> just behind the right side of my workbench. This allows for quick grabs and returns of very frequently used helpers.</p>
<p><strong>Here they are</strong>, left to right, top to bottom:</p>
<p>1. The shop-made <strong>tool oiler</strong>. I wrote about making this in a 3/29/2009 post:</p>
<p><a href="https://www.rpwoodwork.com/blog/2009/03/09/shopmade-tool-oiler/">
<p>The Camellia oil gets used on lots of tools every day. It sits in a little box rack screwed to the wall.</p>
<p>2. A light weight <strong>wooden mallet</strong>.</p>
<p>3. A <strong>heavier mallet</strong> hammer.<span class="Apple-converted-space"> </span></p>
<p>4. A group of usually sharpened <strong>pencils</strong>: good old #2, and red and white. These stand in a leather chisel guard glued to the wall.</p>
<p>5. Two pieces of wood, each with three <strong>grooves</strong>. The neck of my Japanese chisels sits in a groove so the tool will not role.<span class="Apple-converted-space"> </span></p>
<p>6. The pair of <strong>bench dogs</strong> that I wrote about in a 8/10/25 post.<span class="Apple-converted-space"> </span></p>
<p><a href="https://www.rpwoodwork.com/blog/2025/08/10/make-these-bench-dogs/">
<p>7. The handy little <strong>brush</strong> with bristles cut short. This gets countless uses, such as clearing the cutting edge opening of a hand plane.</p>
<p>8. The dead-on accurate 12’ <strong>tape measure</strong>. This also sits in a little box rack like the oiler.</p>
<p>9. A constantly used, durable Lie-Nielsen <strong>dusting brush</strong>.<span class="Apple-converted-space"> </span></p>
<p>10. <strong>Wood shrinkage/expansion monitor</strong>. I wrote about this in a 5/30/2020 post. <span class="Apple-converted-space">  </span></p>
<p><span class="Apple-converted-space"><a href="https://www.rpwoodwork.com/blog/2020/05/30/watch-the-wood-move/">  </span></p>
<p>This modest set up helps efficiency in the shop, and improves the comfort of time in the shop.<span class="Apple-converted-space"> </span></p>
<p>And that is still <strong>good time</strong>!</p>]]></content>
		
					<link rel="replies" type="text/html" href="https://www.rpwoodwork.com/blog/2026/07/01/in-close-reach/#comments" thr:count="2" />
			<link rel="replies" type="application/atom+xml" href="https://www.rpwoodwork.com/blog/2026/07/01/in-close-reach/feed/atom/" thr:count="2" />
			<thr:total>2</thr:total>
			</entry>
	</feed>

<!--
Performance optimized by W3 Total Cache. Learn more: https://www.boldgrid.com/w3-total-cache/?utm_source=w3tc&utm_medium=footer_comment&utm_campaign=free_plugin

Page Caching using Disk: Enhanced 

Served from: www.rpwoodwork.com @ 2026-08-19 18:16:43 by W3 Total Cache
-->