Tag-Archive for ◊ sawing to a line ◊

Author:
• Sunday, August 16th, 2015

sawing warm-ups

There are lots of recommendations available for warming up to saw joinery but here I will concentrate on two aspects:

  • The progression of the warm-up
  • Core muscle activation

The progression

Any good warm-up should include aspects of the main event. To prepare for sawing dovetails, for example, saw to a series of lines that mimic dovetails. As you begin, recall and concentrate on basic technique and mechanics without being primarily concerned about hitting the lines perfectly. You’re like a baseball player before a game, at first taking easy batting practice pitches while just trying to execute sound form and make good contact. Address any neglect of the fundamentals.

Then bear down and try to make a couple of dead-on cuts. Observe the results, sharpen your mind, and clean up your technique accordingly. Find your familiar physical and mental groove.

Make sure there are no deficiencies in your tools and setup, including the lighting. The warm-up also gives you a chance to sense the density and grain of the particular wood at hand and make appropriate adjustments in technique.

For work that you do frequently, the warm-up should be very brief. Even if you’re a bit rusty, it should only take a few minutes, provided your skills are fundamentally sound.

An exercise to engage the core
sawing warm-up

Only when the core – glutes, hips, upper back – is strong, engaged, and balanced, can the peripheral parts – shoulder, arm, and hands – move with accuracy and precision.

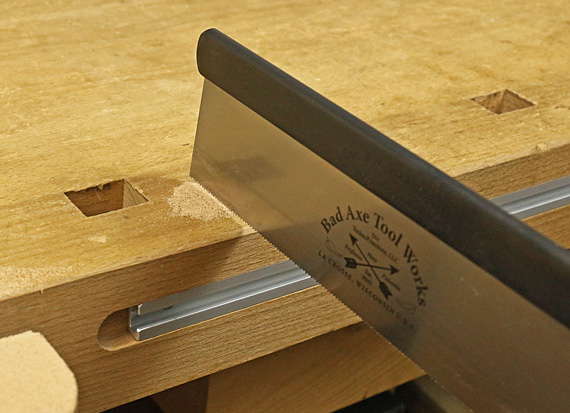
Try this exercise. Make a small, shallow pile of sawdust on your benchtop or scrap of wood. Attempt to create “kerfs” in the pile by pushing the dust with the teeth of your saw without the teeth making contact with the benchtop.

It can only be done with your core muscles engaged, along with a balanced stance.

When sawing joinery with a backsaw, the saw should not be helping to support you. If it is, it is being partly diverted from its primary function, which is to make a kerf, and it won’t be as consistently accurate.

The hand without the saw can rest on the bench or work piece to aid in balance. It should bear the weight of no more than itself and the arm.

By the way, core activation does not mean being stiff. Think of the shock absorbers on a car. They are very strong but allow movement, always maintaining an equilibrium that allows all the other parts of the car to function smoothly and precisely. This discussion is about sawing with a backsaw but even with a handsaw where the entire body moves more, the core is still in primary control of all the motions.

Note to readers: Uncommon tips 1-6 can be found here. More on the way.

Category: Techniques  | Tags:  | 5 Comments
Author:
• Sunday, May 13th, 2012

Tip #5: Be assertive “to the line.” Timid does not work.

To determine if your saw strokes are following the line, you have to observe sufficient incremental progress to close the loop of intent and result. In other words, you have to see how it’s going.

An ineffective strategy is to go very slow, with the supposition that although such extreme care is time consuming, at least things won’t go wrong. Yet if each stroke is barely consequential, such as when using a saw with too many teeth per inch for the job, it is difficult to know how it’s going and how to adjust. Much like learning to ride a bicycle, being overcautious will prevent you from ever learning. At some point, you have to let it flow, even if sometimes you will fall.

The answer is not a dovetail saw with 32 tpi. This is not to suggest being reckless or careless, but appropriately confident.

A similar problem is taking too much clearance from the line. This leads to excessive clean up maneuvers, creating more opportunities for things to go wrong and to lose direction. One-sided tolerance, an awareness of directional errors (discussed in another post), is one of the key concepts in craftsmanship, but it should not be misconstrued as an excuse for timidly missing by a mile.

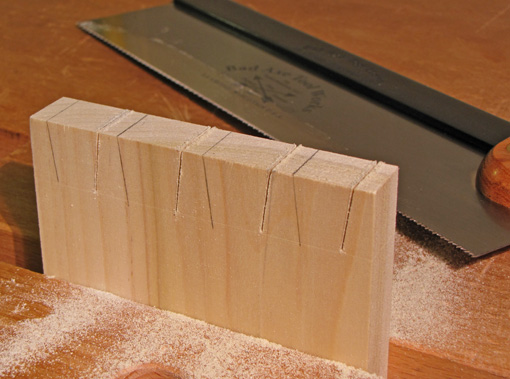
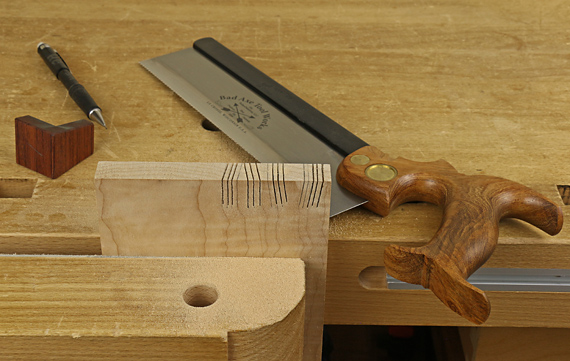
When sawing, the visual and physical senses continually inform each other. As you see success developing, your movements gain assurance. The physical sense takes precedence as the cut proceeds, and as assurance builds, speed can increase as an easy flow develops[In the cuts above, I did the one on the right first, not quite fully assertive, then went at it and split the line nicely on the other three, picking up speed.]

There is a solution to all of this: practice! And if you miss, get another piece of wood. I’ve had a lot of practice at that! Truly, we’re all students.

Happy sawing!

Category: Techniques  | Tags:  | 7 Comments
Author:
• Friday, May 11th, 2012

Tip #4: Since you can only watch one line at a time, see one line while you feel the other.

For most sawing, you are viewing a single line while using a physical registration for the other axis of the saw. I will explain.

In ripping with a handsaw, you follow the line with your eyes and the saw after establishing and then maintaining the saw at 90 degrees to the wood surface. When sawing a dovetail tail, most woodworkers start the saw along the end-grain line, establish that 90 degree relationship, and then view and follow the line down the wood.

In both cases your eyes track one line as you feel the angle you initially established with the saw by using an estimate of position (ripping with the handsaw) or another line (dovetailing). In dovetailing, you can use both lines to position the saw before you start. You can also use peripheral vision to sense the saw’s squareness to the length of the bench or a wall behind it. Yet when you are actually sawing, that initial line on the end grain is really only there to start you out. It is not necessary to continue to watch the remnant of it as you cut down the face-grain line, as long as you maintain a true stroke in one plane.

In any moment, the eyes can only watch one detail. Yes, there is peripheral vision, but even a small distance away from the spot you are “looking at” (technically, on which you are aligning the very tiny center of your retina, the foveal center), the vision is not very clear – not clear enough to follow a fine line. So if you attempt to follow two lines at once, the best you can do is to quickly jump your eyes back and forth from one line to another, and this must be done in the rhythm of your sawing stroke. The feeling one might have of actually accurately viewing two lines at the same time is an illusion.

Now, consider sawing a tenon. For some reason, it is often recommended to follow the end-grain line on top of the wood at the same time as you follow the line down the side of the wood. In other words, to saw a triangle into the wood in one motion.

In this method, the two contact points of the teeth biting into the wood grow further apart from each other as the cut proceeds. Yes, by aligning your eye, the two lines could be viewed as one, but the saw teeth are biting at two ends. Again, the best you can do is actually jump the eyes from one spot to the other.

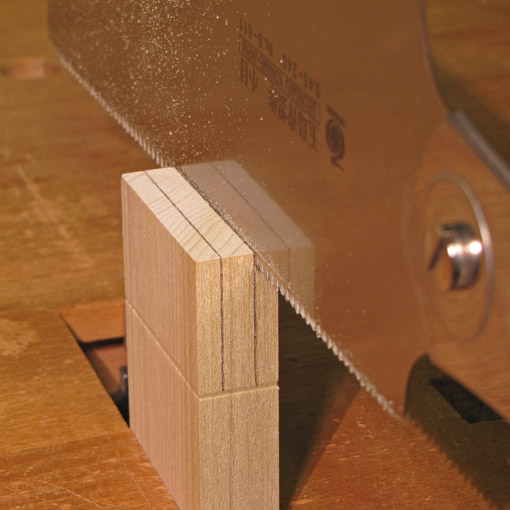
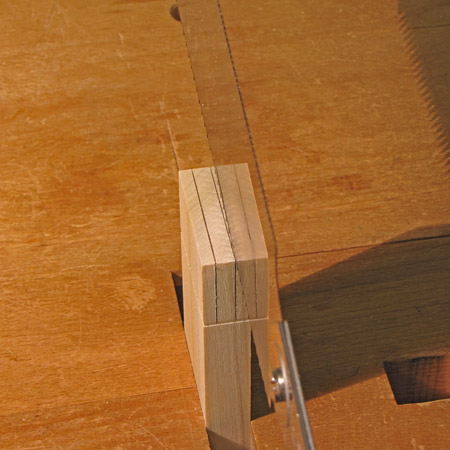
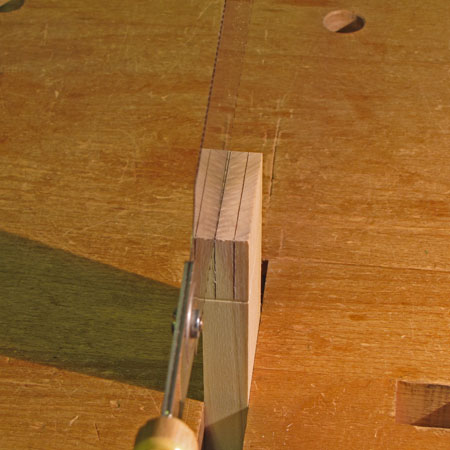
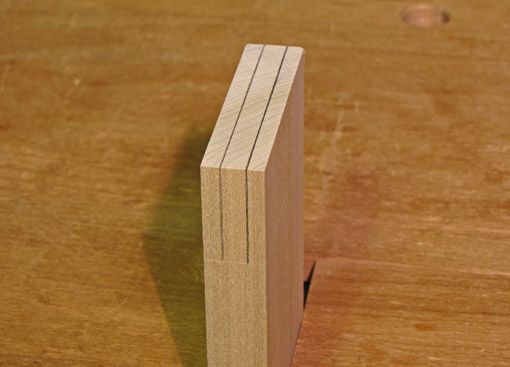
The better way, in my opinion, is to cut the single end grain line first. The eyes follow one line and the saw is held vertical by feel. I like to establish the cut first at the near end, then the far end, work each cut toward the middle, then cut the full width as the saw is established in a kerf. I advance just until the teeth are buried, as seen in the top photo.

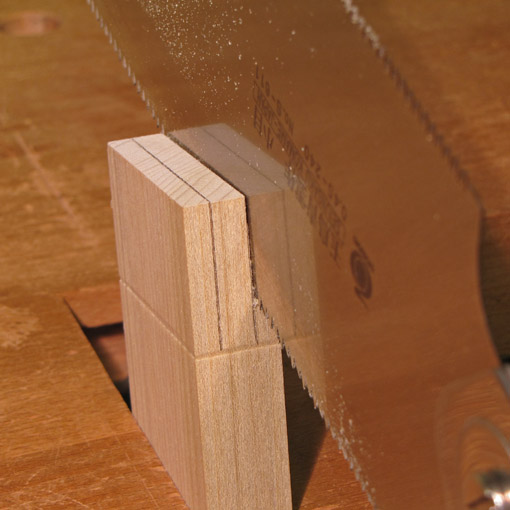
[By the way, if the saw blade is shiny, the vertical orientation of the saw can be checked before starting by observing the continuous straight line created by the top corner edge of the wood and its reflection in the blade. See the photos. I don’t find this necessary, but it is a neat trick to know.]

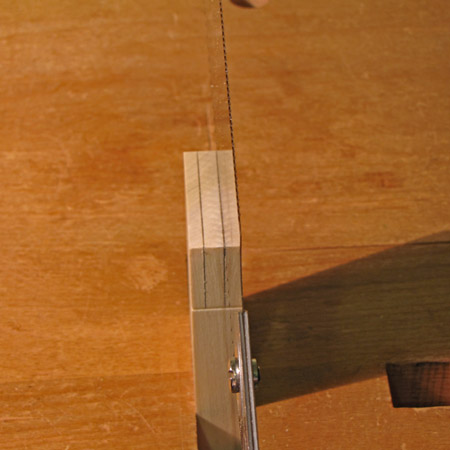
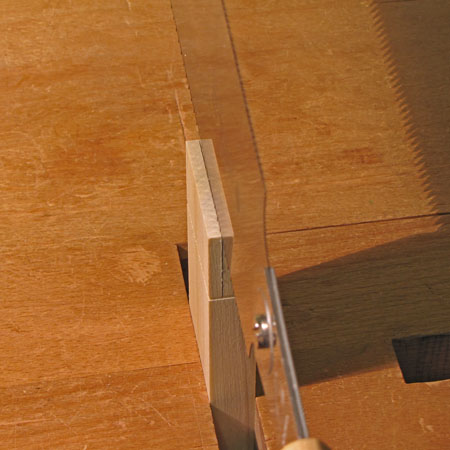
Then I saw the line down the side of the wood, only watching that line. The saw does not bite further in at the far end of the wood, only on the near side, going down the line. The initial kerf established on the end grain is the “line” I feel, as I watch the line down the side. See the photo below:

I proceed similarly on the opposite side. Next, the final remaining internal triangle of wood gets cut almost entirely by feel since there are kerfs all around it. At this point, I do not want to redirect the saw; I’m just going with the flow, by feel, with what has already been accurately established.

A similar sequence is useful in accurately crosscutting beams by hand, such as a 4×4.

Seeing and feeling work together to make accurate sawing.

Next: attitude matters.

Category: Techniques  | Tags:  | 2 Comments
Author:
• Monday, May 07th, 2012

Tip #3: See the line with both eyes if you can.

Most woodworkers feel more comfortable and work more accurately sawing with the line and the saw on a specific side, left or right. For right handers, the most efficient setup has the saw in the right hand and the line to the right side of the midline of the body. Both eyes view the line from the left and see the left edge of the kerf splitting the line and the remaining half-line trailing the kerf. The keeper wood in this case is on the left, the waste on the right. This arrangement is likely to be favored even in the minority of cases in which eye dominance does not match the side of hand dominance.

The photo at the top, demonstrating this setup, is the view with the right eye sawing a tenon. Below is the view with the left eye. The small disparity in vantage points permits stereoscopic (high level binocular) vision.

The key element is that both eyes view the line. If you are fortunate to have two good eyes that align properly, your binocular vision is an advantage over seeing the line with just one eye. The eyes also track better working together than alone. Try it.

Sometimes this desirable setup cannot be achieved. A right hander finds himself with the right eye viewing the line from the right side of the saw, as in the photo below.

Since it is usually very awkward to shift the head fully to the right of the saw, the left eye views from the left side of the saw, as seen below.

The brain cannot blend these two very different images. One image is functionally “turned off” and you are then effectively working in the less efficient one-eyed mode. Sometimes this cannot practically be avoided.

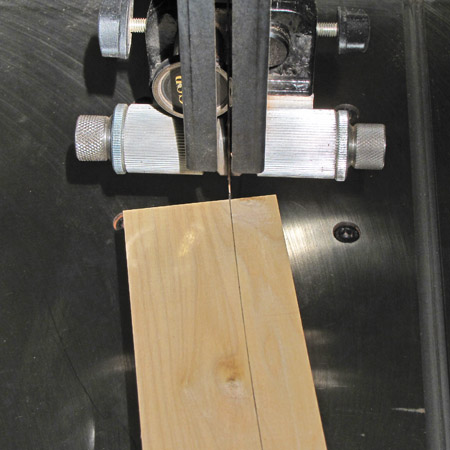
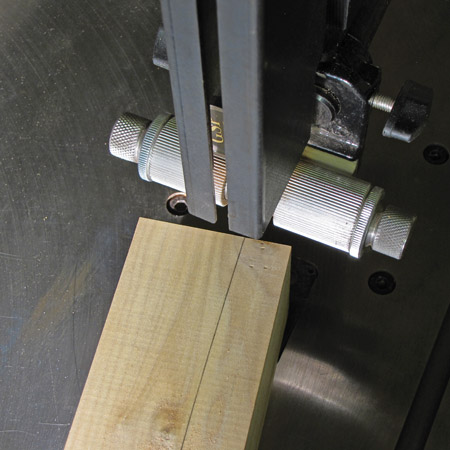
There is another situation to consider. This happens commonly at the bandsaw. One eye, usually the left, gets a good view of the line meeting the teeth, as in the photo below.

Oops, the other eye’s view is blocked by the blade guide/guard apparatus:

You may sense less visual precision without being immediately aware of the cause. The solution is to arrange your stance so that both eyes have a view of the line where it meets the teeth.

Because of the many sawing situations in the shop, there are exceptions to all of this. The basic principle is nonetheless helpful, and being aware of it can help your sawing.

Good lighting (angle and distance), a good quality line, and proper visual correction for the distance at which you are working, also contribute to seeing the line properly. And, yes, you do have to blow away the saw dust regularly, especially with Japanese pull-stroke saws.

Coming up: Do you need to see all of the lines? Can you? When does seeing them become less important?

Category: Techniques  | Tags:  | 4 Comments
Author:
• Monday, April 30th, 2012

Tip #2: Engage and stabilize your core.

“Core” muscles refer to the abdominals, obliques, hip flexors, spinal stabilizers, and the gluteus muscles. Strong, balanced, and activated core muscles allow the limbs to perform properly. Core involvement is the source of much of the precision and power of a tennis player’s swing, a fighter’s punch, and a sawyer’s stroke. Watch Chicago Bears linebacker Brian Urlacher demolish a ball carrier, or Boston Red Sox little guy Dustin Pedroia belt a ball over the fence, and you’re seeing core strength in action.

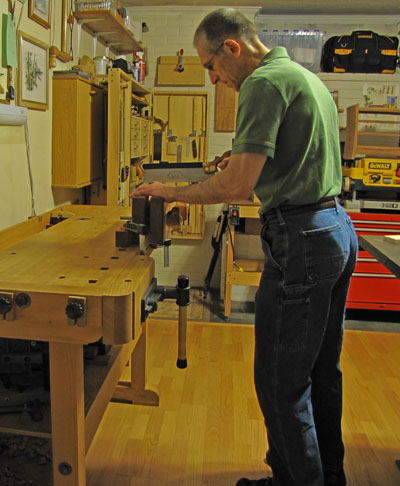
Pick up the saw, place one foot forward, and use your core muscles, especially the glutes, to find a balanced, stable stance. From there, the arm can operate with precision, intent, and strength. A stable core does not mean an immobile core, rather it is a controlled positioning and movement of the trunk. If the trunk is unstable, the arm flails.

Do not fall into the saw stroke, move into it. Maintain balance throughout the stroke. Do not use the bench or the work piece to prop up your body. A partial exception is when using a handsaw with a low saw horse or bench. Even in that situation, the non-sawing hand is really just an aid to the core musculature. You should not be falling on that hand with each stroke. Again, move into the stroke with intent and control, do not flail into it. You can still use your body weight for power, but in control using the core.

It was difficult to take photos for this post. I set the timer and quickly moved into position with the saw but I could only approximately convey the general ideas.

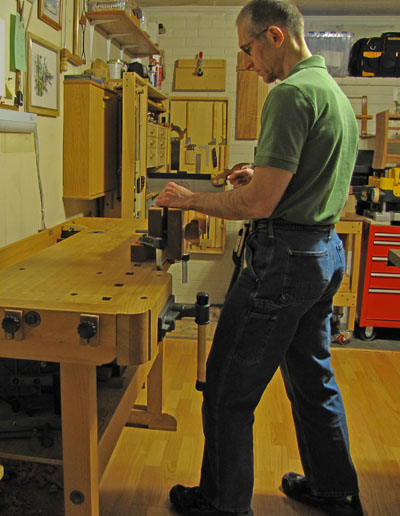
Whew, look at this guy. Bad news:

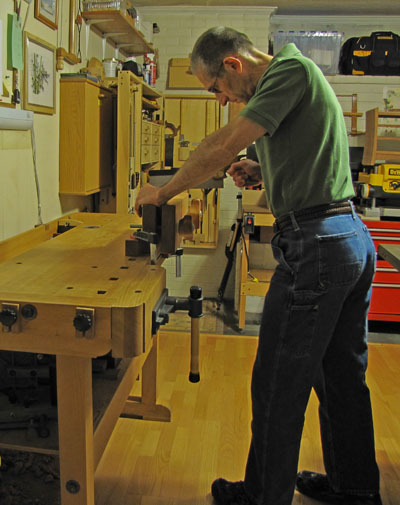
And this guy. Ouch. He won’t last a day in the shop.

In addition to sawing precision and strength, you will also have shop endurance. Woodworkers often complain of low back soreness after a day in the shop, especially with tasks such as sawing joinery and sharpening. The way to avoid this is to use a balanced stance and active glutes to take the excess effort away from the lower back muscles. This applies to machine work too, such as precision sawing at the bandsaw.

Try this: pick up the saw, channel your inner Bruce Lee, and concentrate much more on your stance and core activation – stable, not stiff; intent, not mushy. You may surprise yourself to find following the line is easier and more natural than if you think just about your arm and the saw, forgetting about the all-important core. Be Bruce grabbing the cobra.

The core matters in sawing. I leave it to you to do the homework. 

Category: Techniques  | Tags:  | Comments off
Author:
• Sunday, April 22nd, 2012

All would be right in the world of woodworking if we could saw perfectly to the line every time. Joinery would fit directly from the saw, everything would assemble neatly, we would never grow old, and pay no taxes. In the meantime, however, let us consider some ways to improve this ubiquitous woodworking task. The uncommon tips in these posts apply not only to hand sawing, but also machine sawing without a fence such as might be done with the bandsaw.

We know the basics: an appropriately designed, good quality saw, straight, properly sharpened and set. The work piece is securely held in an ergonomic position. The sawyer grips the saw properly with good hand-shoulder alignment, and produces even strokes engaging the length of the saw.

Tip #1: Consider the line and what it means.

The idea here is to have mental clarity as to just what the line represents and thus how you will saw in relationship to it. Mental clarity precedes physical success.

Consider several scenarios.

If the line is produced by drawing against a template as in, for example, sawing curved legs from rectangular blanks with the bandsaw, then the entire line is in the waste wood. If you split the line with the saw, there remains a half-line of extra wood to remove saw marks and fair the curve. If you want more margin for clean up, make a chunky line and saw right up to it without touching it. The key is to be clear about what you are aiming for and why.

If you use a pencil to mark out pins from the tails you’ve sawn, the line is fully in keeper wood. If you split this line, the pins will surely be too small. If you saw to one side of it, and no more, things should work out fine.

If a part is marked to length by registering it with the end of another part which is thus used as a template, the line will be fully in waste wood. Splitting it with the saw will make the resulting piece too long, but perhaps this is a desired allowance to allow for shooting it just right. Sawing to fully remove the line would be an attempt to produce an exact match from the saw. Again, the intent should be thought out beforehand.

As another example, I set my mortise gauge so the two points are at exactly the width of the mortise and mark out the tenon with this setting. I run a pencil line so the point rubs against both sides of the “valley” of the scribed line. I then know that if I split this line with my saw, the tenon will be just right.

Visually, I find it easiest to split a line with the saw. The visual cue is that as the cut proceeds I can see half of the line remains next to the kerf, and this remainder looks half as wide (easy to estimate) as the uncut line ahead. When sawing to one side of a line, it is easy to be too timid and leave extra wood, though if this is not excessive it may work out fine, allowing for a bit of clean up. Sawing to completely remove a line, but no further, is visually difficult since the result looks the same if you have done it just right or if you have sawn too far into the keeper wood.

The key is to be clear about the “context” of the line and anticipate the next step in construction. In all of these matters, the concept of one-sided tolerance is most helpful.

Category: Techniques  | Tags:  | 7 Comments