Tag-Archive for ◊ router mortise jig ◊

Author:
• Friday, August 25th, 2017

mortise jig wedge clamps

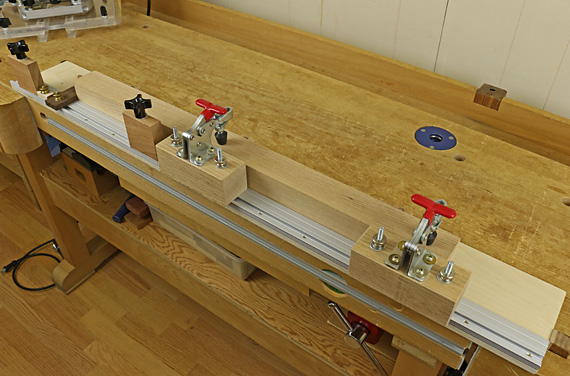
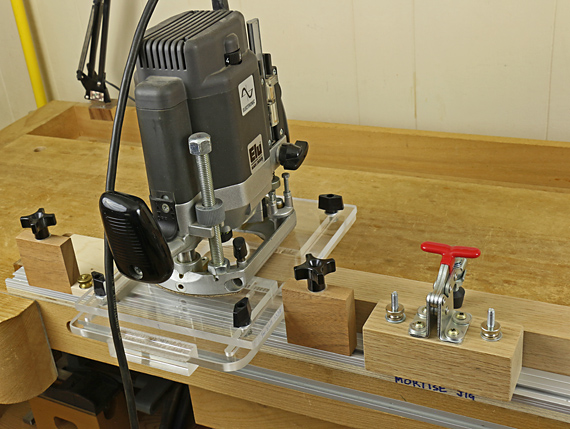
In two earlier posts, I presented a router mortise jig. As writing is a good occasion to rethink matters, I have upgraded the clamping system on the jig. What’s more, this general design for a wedge clamp system can be applied to other shop jigs and fixtures to increase their holding range.

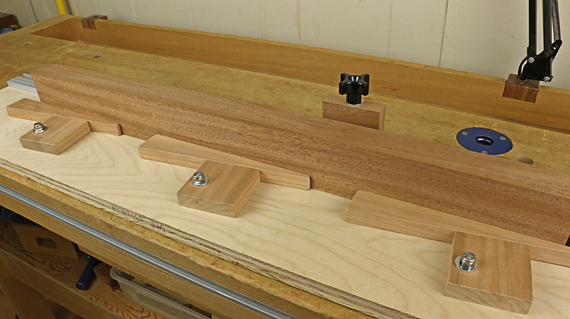
The mechanical advantage produced by the humble wedge is a wonderful earthly thing. I used larger blocks that rotate on an off-center pivot to accommodate a much greater range of workpiece width. The plywood base of the jig is also wider than the original to allow for this, and thicker at 3/4″ for greater strength. The blocks and wedges are 5/8″ thick.

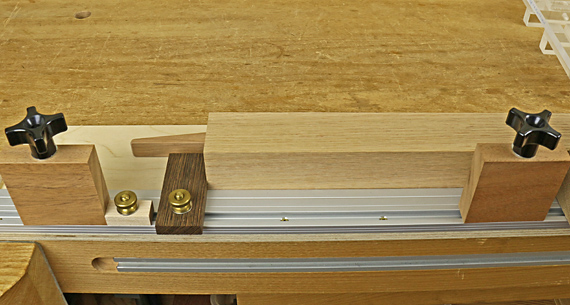
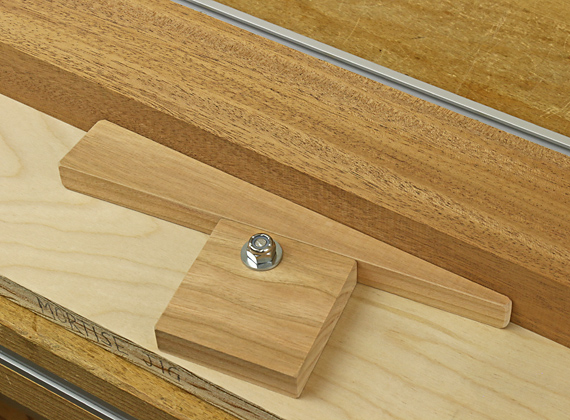
Each block is 2 1/2″ square. The center of the pivot hole is 1/2″ from one edge, and 1″, 1 1/2″, and 2″ from the three other edges. Thus, there are four different rotational positions to create a large range of clamping width capacity.

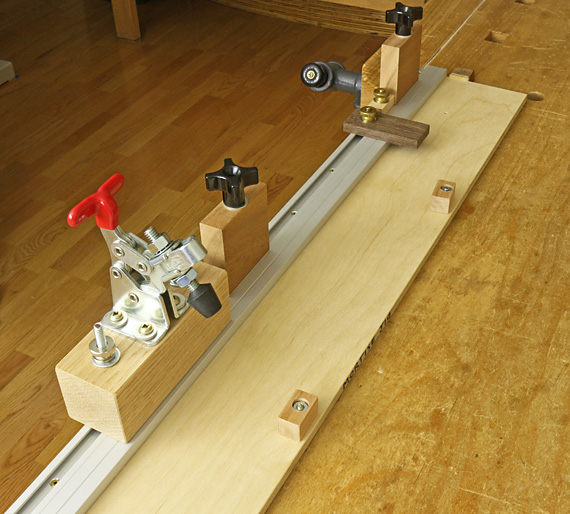
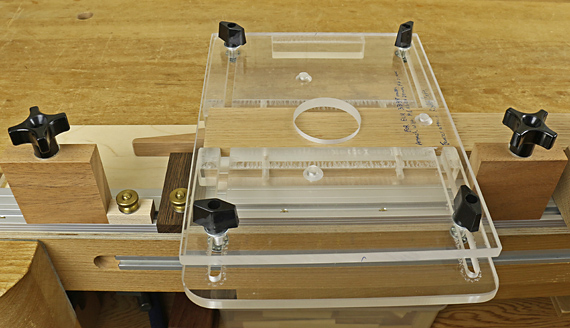
Below, the block is in position to clamp the widest workpieces.

wedge clamps

The wedge is 8 ¼” long with a 1:7 slope. This produces slightly more than 1/2″ range of clamping width, which spans the difference from one block position to the next.

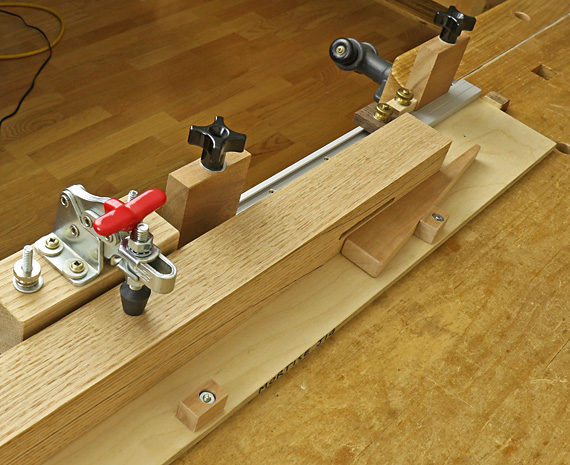
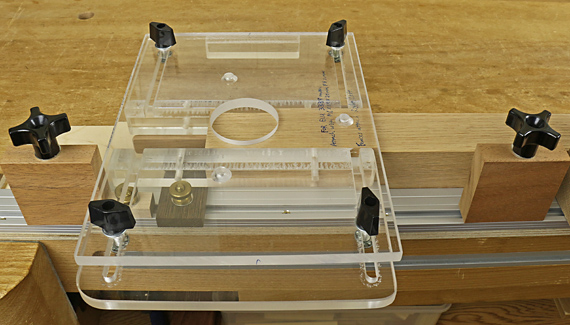
Below, the block is in position for the second-to-narrowest clamping capacity.

wedge clamps

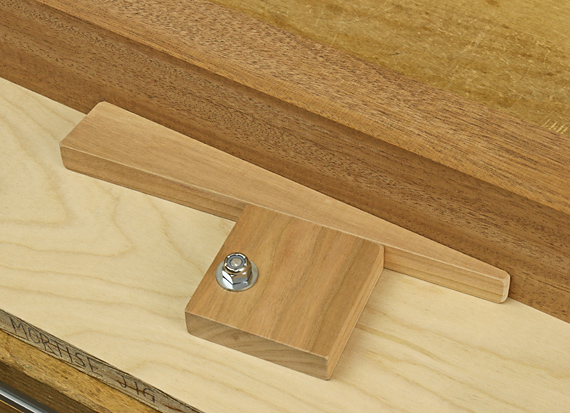
A 1/4-20 x 1 1/2″ hex bolt, unthreaded in the 5/8″ nearest its head, enters from the bottom of the base with the head recessed in a counterbore. It is secured above the block with a nylon-insert lock nut, which is tightened to allow free but firm rotation of the block.

The wedge clamps work so well that they may obviate the need for the toggle clamps. The wedge system particularly makes the jig better for mortising frame members. Because these are narrower than leg blanks, they are best clamped in a pair to increase the seating width for the base of the router jig.

Author:
• Thursday, June 29th, 2017

router mortise jig

Now let’s work through the elements of the jig. The top photo again shows an overall view with a leg blank in place.

Basic construction:

The jig is built on a piece of plywood about 5″ wide and 39″ long. Screwed down along one edge is a double-width T track with the groove placed up at the outer edge. The wide T-track allows the sliding stops to be far enough away from the leg blank to make room for the router fence. (See previous post.)

Workpiece registration:

The side of the leg blank registers against the track, and the end registers against the moveable tab stop that you can see sticking out sideways from the track in the photo below. (It is dark wood – wenge – with a brass knob.)

router mortise jig

Clamping the workpiece:

Two toggle clamps are mounted on 1 7/8″ square x 5″ moveable blocks, which are secured in the track with T bolts. These clamps provide lots of holding power and can be positioned away from the routing action.

For use in addition to, or instead of, the toggle clamps, there is a wedge system, seen in the photo below. This consists of three 5/8″ square x 1″ blocks, distributed along the length of the plywood, that are bolted to the plywood but free to rotate. Wedges, 5/8″-thick x 8″-long with a 1:7 slope, secure the workpiece.

router mortise jig

Stops for limiting the length of the mortise/haunch:

These are 3/4″ x 2 1/2″ x 2 1/2″ blocks that position in the T track and lock down with T bolts and star knobs. You can see them at the sides of the photo below.

router mortise jig

At the right of the photo below, the router fence jig meets the stop to define the bottom of the mortise.

router mortise jig

At the left of the photo below, the router plate jig meets the stop to define the bottom of the haunch (the limit of the full-depth mortise).

router mortise jig

In the photo below, the left-side stop has been moved out of the way create the haunch all the way to the end of the leg. In practice, you would rout this first. Then you would move the left-side stop into place to define the top of the full-depth mortise, as seen just above. That location is “remembered” by the little maple stop with the brass knob.

router mortise jig

In summary:

  • Understood in its separate elements, the jig is not difficult to make.
  • In practice, the whole thing is very intuitive to set up from mortises marked out in the traditional manner on one leg only.
  • The mortising work moves along quickly.
  • The jig can handle most common leg blank sizes that you will use to prepare the joinery before cutting the shape of the leg.
  • It can also be used with rail and stile work but workpieces thinner than about 1 1/4″ will need to be paired with thicker wood to better support the router. The jig was designed mainly for mortising table legs.

[Skip this paragraph if you want; it will be apparent when you work with the jig. Depending on the circumstances and personal preferences, you can rout four corresponding mortises with the leg registered at one end of the jig, retain the router fence setting, and then reset the mortise jig to register the legs at the opposite end of the jig to make the other four mortises. Alternatively, you can retain the mortise jig settings and reset the router fence.]

Author:
• Thursday, June 29th, 2017

router mortise jig

Here is a very direct approach to mortising with a router that works especially well for mortising legs.

The system starts with an auxiliary router base plate that rests on top of the squared leg blank and has two adjustable fences that hug the sides of the blank to eliminate side play. I have been using the one shown here, made from acrylic, since I bought it from Woodhaven more than 25 years ago.

router mortise jig

Though it is no longer available from Woodhaven, it does not seem difficult to make a similar version from plywood, perhaps lining the fences with adhesive UHMW plastic. The base is about 10″ wide and 8″ deep. Each fence is an L-shaped construction. The long arm of the L has two slots, in which slide bolts that pierce the base and are tightened to fix the fence position. The short (1″) arm of the L rides along the side of the leg blank.

It probably would be good enough to substitute the L fence with just a flat piece of plywood, though the height of the fence is added insurance against tipping. Alternatively, you could slot the base and use simple hardwood strips for the fences. I trimmed the fences to ensure that no part of them extends beyond the base plate, so it is only the base plate that will meet the stops that define the mortise length, as you will see later.

The idea is nothing more than a double-sided router fence.

router mortise jig

So, that’s simple enough. Now we need two more elements. First, is a way to reliably register the workpiece in place, and then clamp it there. Second, we need stops to define the ends of the mortise (and a haunch, if required). To make the jig adjustable for different layouts, these stops must adjust independently from the workpiece-registration element and clamps.

Below is an overall view. It is really simpler than it might look at first. Trust me, I hate complicated jigs – I’ll break down this one for you in upcoming posts.

router mortise jig

By the way, the plunge router is an Elu 3338, vintage about 1990 and still mortising strong. It is very similar to the current DeWalt DW625, though the Elu was made in Switzerland.

Category: Jigs and Fixtures  | Tags:  | Comments off