Continuing the topic of transferring the layout of the sawn tails to the endgrain of the pin board, the purpose of these posts is not to argue for the superiority of any one method but rather to array the options to help you choose what works best for you and the specific project at hand. I vary my method depending on the species of wood, the type of dovetail (e.g. through or half-blind), and the thickness of the wood.
V-point knives seem to be popular for this task, especially thin models that can slip in between narrowly spaced tails, such as the beauty made by Blue Spruce. Without a doubt, many highly skilled woodworkers produce excellent results with these tools, but I find it difficult to see the knife line.
I do not mean that it is difficult to see the fine knife line at first, but when I start sawing across the endgrain, I cannot visually keep track of that skinny line to confidently split it with the saw. Chalking the endgrain is not much help. The scriber makes a V-groove that I can track and split better while sawing, and furthermore allows me to better see how I’ve done afterwards. I also find that a V-knife sometimes catches the side grain of the tail, slicing off a hair of it and slightly dislocating the layout line, albeit in the safe direction.
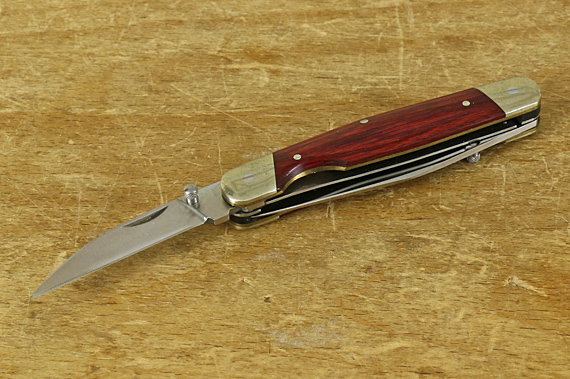
Ian Kirby, one of my all-time favorite woodworking teachers, has favored a pocket knife for this task. This is not my preference but again, it is another option to consider. The sheepfoot in your three-blade stockman or a Wharncliffe blade like in this lovely Kershaw would be good choices for this because it is easy to reach the tip all the way out to the base of the tail.
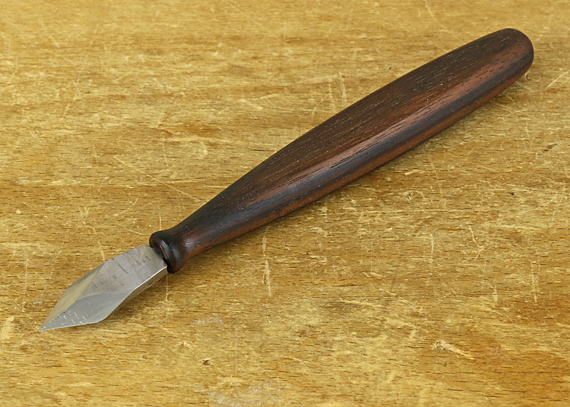
One knife that I sometimes use is my modification of a Pfeil #13 chip carving knife. I removed the edge and a bit of the width from all but the first 1/4″ of the blade. I also ground the sides to a nearly flat single bevel. (The Pfeil #3 knife would probably also work.) I find this modified tool very easily reaches to the base of the tail and follows the wall of the tail with very little tendency to slice into it. So, I like it better than a V knife but I still usually have the dilemma of following a pretty fine knife line.
What about the roll of blue tape in the photo in the previous post? Mike Pekovich, Creative Director of Fine Woodworking magazine, and a very skilled and thoughtful craftsman, covers the endgrain of the pin board with blue tape. (FW #240) He then knifes the tail outlines into the tape, removes the tape over the waste wood, and saws just adjacent to the remaining pieces of tape, which represent the pins. Clever!
I experimented with Mike’s method. It surely has merit, and some will love it, but I am not comfortable with it. The pieces of remaining tape can move, especially if you knick them while engaging the saw, and when they do move, I’m lost. I also do not feel comfortable with a piece of tape determining the registration of the saw. But give it a try, you might like it.
Next: using saw kerfs as layout.

Hi Rob,
Why did you stop using the Chosera 10,000 stone for your sharpening setup? When it comes to plane blades and marking knives, you only put the back bevel with the ruler on the plane, and not on the marking knife correct? I’m referring to a V style marking knife more specifically! Been following your blog, and in looking forward to “stealing” your router table and sharpening bench setups!
Hi Brad,
Regarding the Chosera: http://www.rpwoodwork.com/blog/2014/12/22/chosera-10000-update/
Regarding your sharpening question: I think you are talking about David Charlesworth’s wonderful “ruler trick.” That is not a back bevel but only a very tiny width of a minute bevel on the order of 1/2° used to facilitate sharpening. (He gives an excellent explanation and demonstration of it on You Tube.) I use it on plane blades. It would interfere with the registration of the back of tools like chisels and marking knives against the work piece, and is therefore not used for such tools.
Feel free to “steal” anything from my writings! That’s a big reason I write – to help people enjoy the craft and perform it effectively.
Thanks for reading,
Rob
Thanks for the response Rob. I’m looking forward to using the router table once it’s finally together! I was referring to the ruler trick, and have seen the YouTube video giving a very apt description about what it entails. I’ve begun using it on my planes, and everything seems to be working out quite nicely so far.
Currently, my finishing stone is a Shapton 12,000 Kuromaku. I don’t like the feeling of it, but the cracking of the Chosera has scared me away from switching! Especially at the cost..
I appreciate the time, keep up the writings, I enjoy them! Looking forward to stealing the sharpening station idea as well.
Brad,
I have been using a Shapton Kuromaku 8,000 for a while now, though I have not written about it yet. I use it after the 3 micron DMT diamond stone. It is a good endpoint but since I’m a bit nutty about sharpening, I like to go to the Gukomyo 20,000.
You may like the feel of the Kuromaku better if you use a diamond nagura to prep the stone. Search for “nagura” on this site for more info.
Rob