Like many woodworkers, I have a mixed view of honing guides. After many years of using a modified freehand technique involving simple shop-made angle setting blocks, I now use the Veritas Mk.II guide for much of my honing. Maybe it’s because I have more blades, maybe it’s a matter of less patience, but I do like to try to refine my systems and this is where I am now.
The main advantage of a mechanical honing guide is in reliably and accurately returning to a secondary bevel formed in the previous sharpening or within the same sharpening session. This comes at the price of more complexity in the system. Moreover, the versatility of the Veritas Mk.II makes it more complex than most other guides.
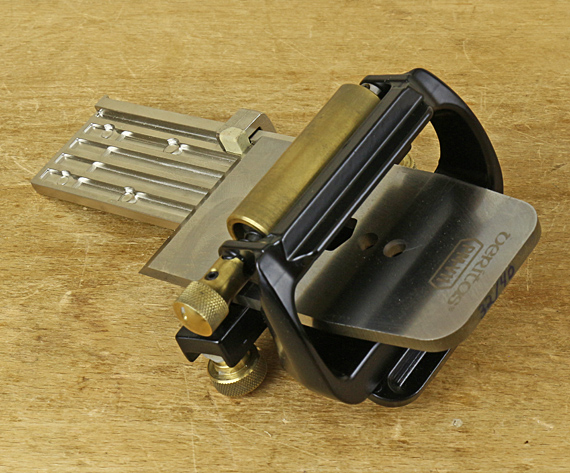
My attempt to simplify use of the Mk.II involves setting the extension of the blade from the front of the jig, which is one determinant of the honing angle. To register the extension (and square the blade to the jig), the MkII uses an attachment to the main guide that you have to slide on and tighten. Then you bring the edge of the blade up to a metal stop on the attachment. Once you have tightened the blade in place, the attachment is removed and you can commence honing.
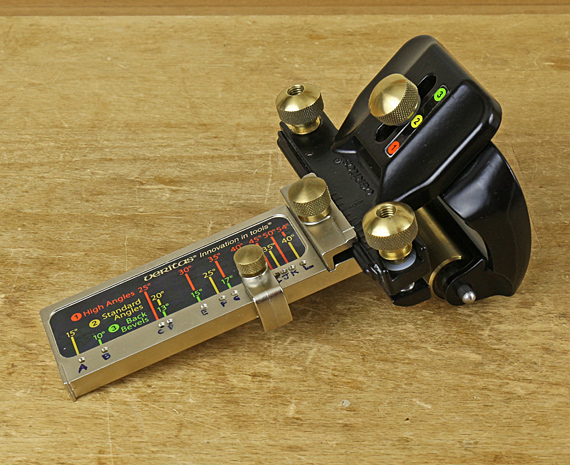
The registration stop on the attachment is set in one of a dozen locations, each with a dimple to maintain repeatability. Each location of the stop allows several different honing angles depending on three possible settings of the clamping head on the roller base and four possible adjustments of the roller itself. The specific angles are in a table provided with the tool.
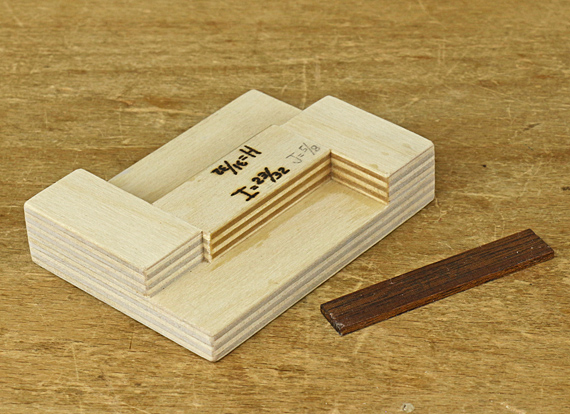
Ugh! But it’s not as bad as perhaps I’ve made it sound. In any case, 90% of my honing (and probably yours) can be accomplished with just two blade extension settings, specifically, the “H” and “I” extension lengths, which can render honing angles from 30° to 47.2°. (See Veritas’ instructions.) So, instead of fiddling with the attachment device, I use the simple wooden extension stop shown in the top photo. The little shim produces the “J” setting, which covers most of the other 10% of the angles I use.
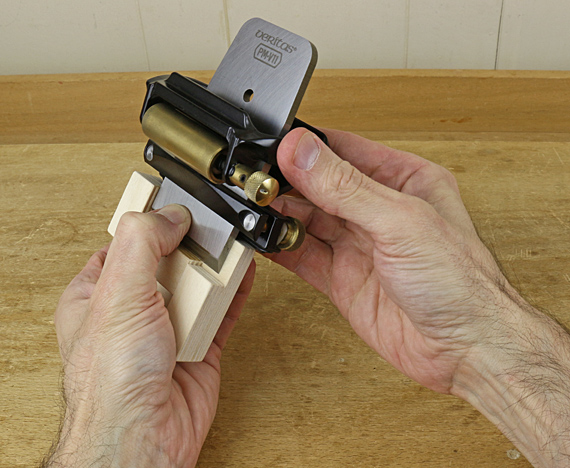
I find this wooden stop to be faster than the Veritas attachment, and just as repeatable. It does take a little practice to coordinate the stop, blade, and Mk.II in your hands. Another advantage of the wooden stop is in avoiding metal near the edge of the blade, particularly if you have to repeat the setting in the same session for a partially sharpened blade that you want to work on further. It also works with the narrow blade clamp, which is especially helpful for Japanese chisels.
With this simple shop-made jig, I can enjoy the advantages of the excellent Veritas tool while avoiding some of its complexity.
Addendum 12/8/19: The letter designations, H, I, and J (referred to above) for the dimple positions on the Veritas blade registration jig that is used with the MkII honing guide are no longer used in the current version of their instructions, copyright 2018. In the original instructions, copyright 2011, which I have, they use letters to refer to the dimples in the jig. H is the 20-30-40° hole as labeled on the jig, I is the 45° hole, and J is the 35° hole. The blade registration jig and the honing guide have not changed, so the rest of the above remains applicable.

I also use the Mk.II and you are right about the registration stop, it is a little bit cumbersome. I like your jig, good idea! Thank you for sharing!
Hi Rob,
I just came across this post, and I was hoping you could clarify a point for me. You lost me at “H”, “I”, and “J” extension lengths. All I can figure out is that you are referring to the 3 positions for the Blade Carrier Head. If your jig is set to either of those positions, I don’t see how you then set the bevel angle. My instinct would be to choose one of the Blade Carrier positions (I would choose yellow, the standard angle configuration, because it will work with both the standard Blade Carrier and the Narrow Blade Carrier. Then I would set the stops on my jig to the bevel angles I want to use (e.g. 20, 25, 30, 35, and 40). That would require five different stops on the jig. But I really want to understand what you set your stops for, and the “H” and “I” designations (which I could not find in the Veritas instructions). I know I’m missing something here and would appreciate your help in “getting it”. Thanks.
–Tom
Tom,
The H, I, and J refer to the hole positions in the angle guide. H is the 20-30-40° position, I is the 45° position, and J is the 35° position.
Thank you for your question. Veritas has rewritten the instructions for the MkII and no longer uses the letter designations.
I added a note at the end of the post to clarify this.
Rob