Twisted boards and twisted work surfaces can thwart accurate woodworking as surely as twisted logic.
You can test small pieces for twist, such as a small door frame, by simply placing it on a verifiably flat surface such as your table saw top, jointer bed, or workbench. Press or tap on diagonally opposite corners, and look and listen for rocking.
Of course, those reference work surfaces must first be vetted. And that method is impractical for larger pieces. You cannot reliably detect twist with only a single straightedge, and so you need winding sticks in the shop. These are simply two sticks, one placed at the near end of a board, the other at the far end. You position yourself back from the near stick and sight along the top edges of the sticks to see whether they are in the same plane, and thus detect any twist in the surface of the board.
Let’s explore this essential tool, starting with building it.
I prefer to keep this tool simple and functional, without adornment. You can find many variations, such as those with elegant inlay or cute little windows. If you want to gussy them up, go for it, but keep the fundamental requirements in mind.
The geometric requirements are simple: two sticks with straight top and bottom edges. With the two bottom edges aligned, the two top edges must be parallel. (Technically, the top and bottom edges of each stick do not have to be parallel to each other, but you probably will make them that way.)
2 – 2 1/2″ is a decent width for the sticks, and they should be thick enough – say 3/4″ – to stand on edge reasonably stably. Chamfer the top edges to about 3/32″-thick for easier sighting. Stable, quartersawn wood is a good material.
For length, 12″ is too short – it won’t adequately magnify the twist error. Much beyond about two feet long and it gets harder to scan your sight side-to-side to the ends. My 21″ winding sticks work well for my mostly small to medium-sized furniture making. They used to be longer. If you work with big slabs, make big winding sticks.
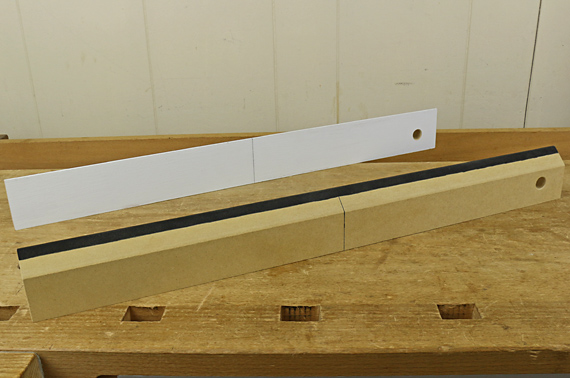
Long ago, I made what I thought would be a quick version, but I have been using them ever since. I simply ripped 3/4″ MDF, and with a little tweaking, brought the edges straight and parallel to less than .002″ tolerance.
This is a visual tool, so it is necessary to create obvious contrast between the two sticks at their top edges. I painted one white to use as the far stick, and used a Sharpie marker to blacken the area around the top edge of the near stick. If you want to use holly and walnut inlay, enjoy.
Some woodworkers prefer to mark incrementally spaced lines, say 1/16″ -1/8″ apart, on each end on the rear stick near its top edge. The idea is to quantify the twist error. I prefer to leave the rear stick unmarked and work more intuitively. I also find that the clean white background avoids the visual confusion of the lines. I suggest experimenting to see what you prefer.
In the next post, I’ll cover methods of use, including a nifty trick, refined in a way that I don’t think you’ll read about from other sources.
