The first, most critical step in making this type of drawer is sizing the front. The drawers in this project are about 14 inches wide, 3-4 inches high, and 12 inches deep. For the fronts, stock is face jointed and thicknessed to about ½ inch. “False fronts” will be applied later to bring the final thickness to about 11/16 inch. (The methods described here are applicable whether false fronts or customary half-blind dovetails are used.) Each piece is ripped to a hair less than the height of its housing and crosscut to slightly larger, about 1/32 inch, than the housing width.
Unplug the machinery. The following hand planing is best done with a shooting board. [Here is my shooting board and how I use it for end grain on any size board and for long grain edges on small boards.]
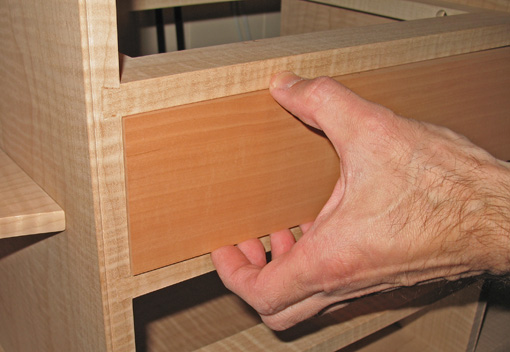
First, the bottom reference edge of the drawer front is planed straight and square and identified with a mark. Then the left end is shot to match the left side of the opening. Progress is tested by offering up the piece to the housing, resting it on its bottom, and checking the left edge. (Photo, above.)
Now it’s time to get very careful. This step is probably the most important point in your drawer’s success. Bit by bit, the right end of the drawer front is shot so it just barely makes it into the width of the housing. It should be snug!
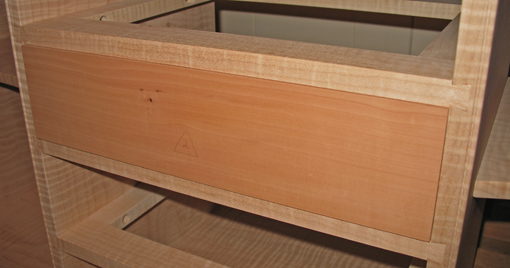
Finally, the top edge is planed so it comfortably fits in the height of the opening and is parallel to the upper edge of the opening. By keeping this gap small, 1/32-1/64 inch, it is easy to detect any deviation from parallel by eye. Note that the top and bottom edges of the drawer front are not necessarily exactly parallel to each other at this point because the piece has been fit directly to its opening.

This is incremental work. It is nice if the drawer opening is a perfect rectangle but this is not assumed. Any deviations are accounted for by fitting each drawer front to match its opening. With this method, errors do not compound as the project progresses. The drawer front prepared in this way is now the reference for constructing the entire drawer.
I do not make the height a snug fit as is sometimes taught. I believe that is a waste of effort since the finished solid wood drawer must not fit tight in height because it will bind when the humidity rises. The “air tight” drawer, in my opinion, makes no sense; it won’t work. I also do not shoot the front to produce tapered edges for fitting in its opening, because I want to work with square reference edges when I cut the joinery.
Once you have thoughtfully prepared the case and fit the drawer front accurately, there is not much left from here on that is at high risk of going wrong, as long as you are patient.
Next: making and joining the sides and back.


I’m really enjoying this series so far. These tips will come in huge for my next project, a sorely needed entertainment center for my basement.
Another excellent post. I can see that many of my questions about drawer construction will be answered as this series goes along. Thanks so much for putting this up.
Jeff
Thanks, guys.
This, of course, is just one of many ways to make drawers so consider the function when choosing a drawer construction design. For example, Torch, ball bearing metal slides may be more appropriate for heavy electronic equipment.
Rob
Hi Rob,
How do you, or do you, mark on the drawerfront’s surface to indicate what gets planed off? Do you scribe from behind, within the opening, or do you make small lead pencil marks on the front, or forego marking?
Thanks,
Tico
hey im liking this series! i’ve never seen this way of fitting a drawer, i’ve always left the front 1/16″ wider than the opening and plane to fit. but i did read about the “let-go” method in james krenov’s books. i assume you leave the tails proud of the surface instead of leaving the pins proud when you cut your joints?
Hi Tico,
When shooting to fit the width, the amounts removed are very small, so I’m planing and testing, back and forth, with the cabinet close by. So I usually don’t mark unless my brain is fuzzy that day.
Nick,
Yes, the sides are dovetailed so they are slightly proud of the end grain of the front and then planed to make the drawer fit its opening. I will go through this in detail later in the series. It’s really much easier than it may first seem.
Thanks for reading.
Rob